Adding notes
Notes enable you to track information about other activities for an entity, and to make it accessible to the whole coverage team, specific users, or only to yourself. For example, after a phone call with a client you can add a note to the entity record to update the coverage team on the key discussion points and outcomes. If needed, restrict the note view security to specific members of the coverage team and edit security only to yourself.
Use the Notes card to enter and save new notes or browse existing notes about an entity. The Notes card displays its contents in reverse chronological order, with the most recent note at the top. To create a new note, enter text in the Type new note here field and click the Save button . To edit just the text of an existing note, click the View/Edit button . To edit note details, print a note, or delete a note, select the option from the More Actions menu .
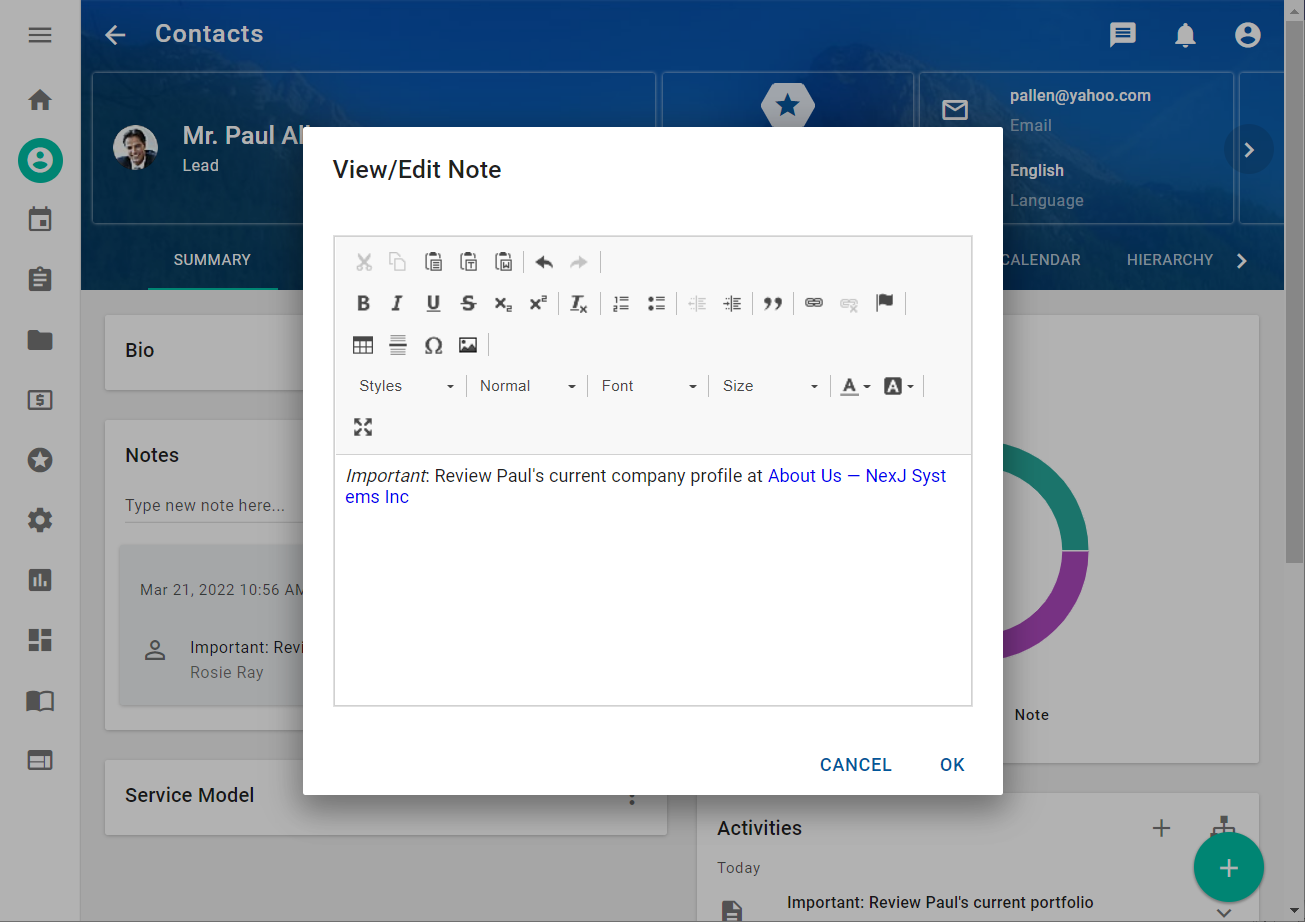
Notes on the Notes card are always created and displayed in plan text without additional styling or formatting. However, if rich text formatting is enabled in your deployment, you can click the View/Edit button to add rich text formatting to the text.
If rich text formatting is enabled, a toolbar is displayed on the top of the text field. You can use the toolbar at the top of the field to include styles such as bolding, italics, bulleted or numbered lists, tables, and hyperlinks. You can also click the Image button in the toolbar and upload images from your computer. The images cannot exceed 2MB in size and must be in JPG, JPEG, or PNG format. To specify additional image settings, such as image size or alignment, navigate to the Advanced tab in the Image dialog.
You can copy text and paste it into a Notes field. When your cursor is in a Notes field, you can press Ctrl+V to paste copied text from your clipboard into the Notes field or right-click in the Notes field and select Paste.
If rich text formatting is enabled, when you copy and paste formatted text, it retains the formatting.
Every note in NexJ CRM is considered an activity of the type document. As a result, you can also view and create notes for a contact in the Activities tab, by selecting a document template called Note.
If rich text formatting is enabled, notes in the Activities tab always include rich text when they are created or edited.
When editing note details from the More Actions menu, you can change the view and edit security for the note in the Security tab of the Edit dialog. By default, both the view and edit security for notes are set to Public. For more information about security settings, see Security settings for objects in NexJ CRM.
Entity security settings impact note security in the following ways:
- When the entity view security is set to Private, the entity and the associated note are only visible to the user who has view security. As a result, only that user can view or edit the note.
- Entity edit security does not impact note edit security. When the entity view security is set to Public and edit security is set to Private, the note is visible to all users and all users can edit or delete the note.
The Security tab is not available when the Hierarchical Access Model is enabled.
Insights, Inform, and Engage
Insights, Inform, and Engage are products in the NexJ Nudge-AI Suite.
Insights automatically detects client interests and life events based on the notes in their profile. When you add a note that contains certain key terms, the terms are added as interests for that client or used to create nudges for the client.
Inform generates a list of news articles for a contact, based on their interests. To ensure that the articles in the list are relevant to the client, advisors can add topics as interests in the client's profile. If both Insights and Inform are enabled in your deployment of NexJ CRM, keywords discovered by Insights in a client's notes are also added as interests to their profile. Advisors can see the list of all relevant articles on the Inform tab on the contact's profile, and then share the articles with the contact by email. You can use the Inform tab to manage both automatically discovered and manually added interests. All interests can be added, deleted, and enabled or disabled for a specific search. For more information, see .Inform v21.12.
Engage generates a prioritized list of nudges to let you know the most important touchpoints for your clients on any given day. Nudges are next-best-action reminders that are scheduled based on client profile information, such as a birthday or a deadline for a portfolio review. If both Insights and Engage are enabled, nudges are also generated based on keywords discovered by Insights from notes on the contact's profile. Nudges are displayed as tiles on the Nudges card on the Home workspace and on the Nudges workspaces. You can act on both types of nudges, by creating a task, creating a schedule item, or sending an email. You can also acknowledge the nudge to dismiss the reminder or snooze the nudge. For more information, see .Engage v21.12.

