Configuring global system settings
The System page in NexJ System Admin Console enables you to manage session timeout settings, global process concurrency settings, recurring schedule items, message queues, the frequency for generating new periods, and monitor the health of your application server clusters.
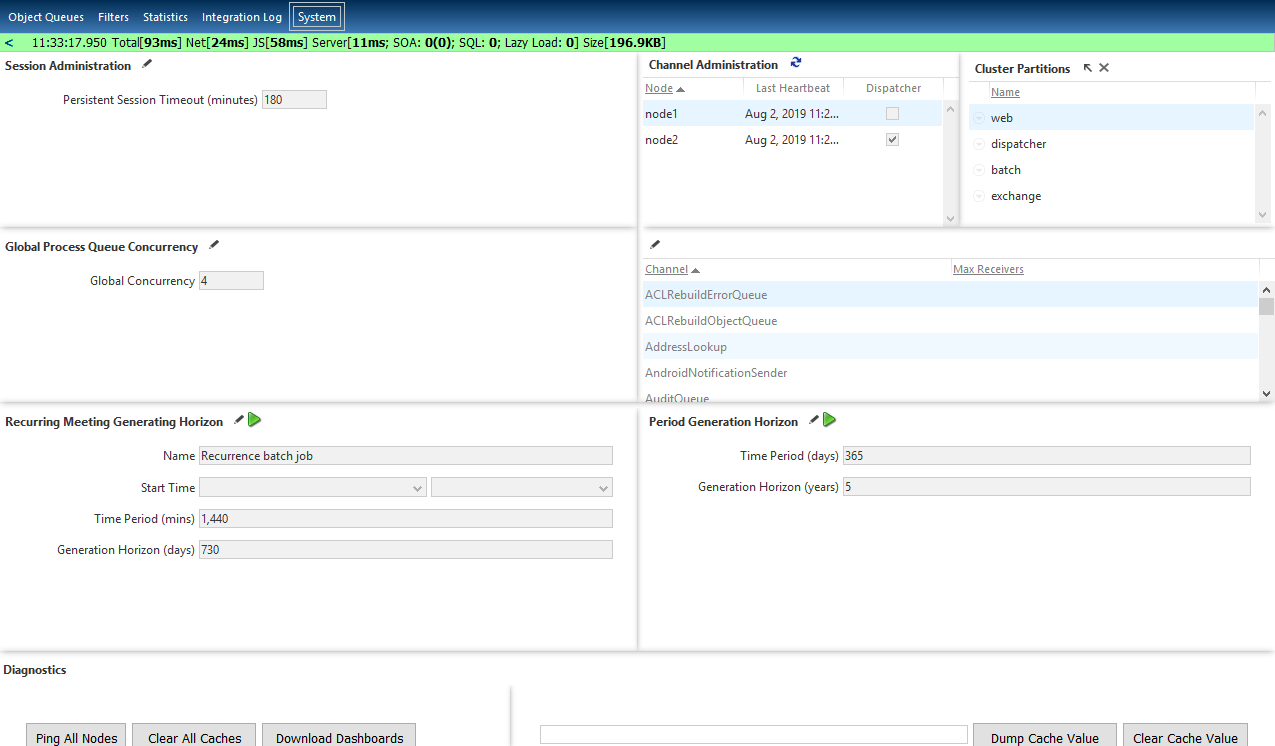
The following image shows the System page.

The System page is divided into the following areas:
- The Session Administration area enables you to define the period of time after which persisted session information is removed from storage.
- The Global Process Queue Concurrency area enables you to specify the maximum number of processes that can be running concurrently.
- The Recurring Meeting Generating Horizon area enables you configure recurring schedule items.
- The Channel Administration area enables you to administer message queues.
- The Period Generation Horizon area enables you to configure how often and for how many years new schedule periods are generated.
- The Diagnostics area enables you to monitor the health of application server clusters and download dashboards to use with Grafana.
Setting session timeout preferences
You can set persisted session timeout preferences in the Session Administration section of the System page. The persisted session timeout setting defines the period of time after which persisted session information is removed from storage.
The amount of time after which session information is persisted is specified in the server or environment file, defined by the Session Timeout property in the Clustering/Session subtab in the environment file editor. See Configuring Model Server for more information.
The Persistent Session Timeout property must be set to a larger value than the Session Timeout property to avoid potential race conditions which may lead to unpredictable and unexpected behavior.
To set session timeout preferences:
The session timeout value is updated.
Managing message queues
You can set up throttling or turn on and off your message queues by editing the maximum receivers for each channel.
A message is a secured communication between users within a conversation.
To manage message queues:
The maximum number of receivers is defined for the selected channel.
Setting global process queue concurrency preferences
The global process queue concurrency setting specifies the maximum number of processes that can be running at the same time. The setting also specifies the maximum number of processes that you can define for an individual process queue in the Process Queue page.
Consider modifying this value when you need to increase the concurrency for the system or on a specific process queue. Ensure that you test in a non-production environment and consider making incremental changes to the value to avoid encountering performance issues in your production environment. By default, global concurrency is set to 4.
To modify the global process queue concurrency value:
The global process queue concurrency value is updated.
Setting the recurring meeting generating horizon
You can configure how far ahead recurring schedule items will be created and how often they will be recreated.
The recurring meeting generating horizon is the threshold for creating recurring meetings in the database.
To set the recurring meeting generation horizon:
The application will automatically generate the recurrence instances to the end of the generating horizon, and continue to regenerate according to the set time period.
You can run the batch job manually by clicking the green button at the top of this area.
Setting the period generation horizon
You can configure how often and for how many years new periods are generated.
The period generation horizon is the threshold for creating the periods that are used by SLM touches. A batch job creates new periods at the frequency specified by a user.
To set a new period generation horizon:
The application will automatically generate the different periods from the current year to the end of the number of years specified.
You can run the batch job manually by clicking the green button at the top of this area.


