Developer Mercurial guide
This guide is intended for new developers who have joined a team that is using Mercurial as the version control system. It provides a step-by step walk-through of the general development workflow using Mercurial, and also includes some additional techniques for more advanced users.
Prerequisites
This guide assumes that a developer has:
- Installed NexJ Studio
- Installed the Mercurial Eclipse plugin
- Has checked-out the project(s) that will be worked on
Setting up common extensions
There are some commonly used extensions, and it is highly recommended to have these extensions enabled. To do this, go to C:\users\<USER_NAME> and open the mercurial.ini file.
Find the [extensions] and add the following settings if they are not there already:
[extensions]
largefiles =
hgext.convert=
rebase=
strip=
eol =
The largefiles extension is needed to work on the finance project. The rebase extension allows developers to move a change to a different parent, and the strip extension allows removal of local changes.
Ensure that the end-of-line (eol) extension is also configured. Add the following code to the mercurial.ini file if it isn’t there:
[eol]
native = CRLF
only-consistent = False
When publishing jars, the end of line character has an impact on the checksum. Framework developers must ensure that their source files are using CRLF as their end of line character, or they won’t be able to use the Ant build job.
Development process with Mercurial
Pulling code from the remote repository
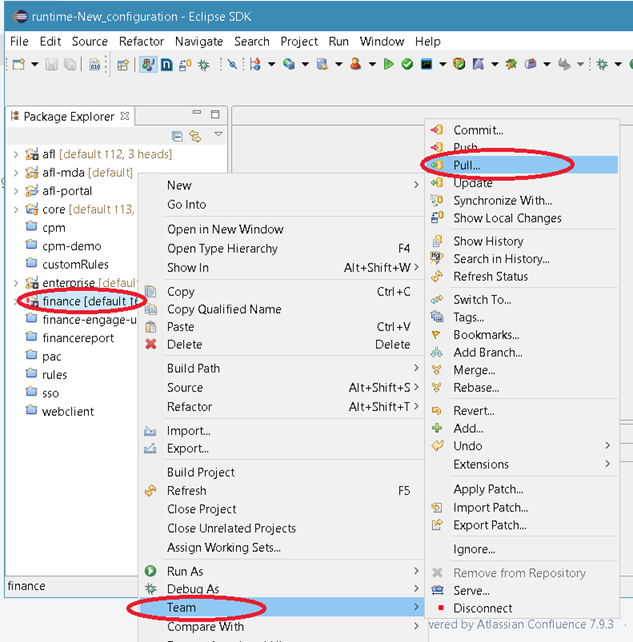
In the Java view, right-click the project you are working on, and select Pull.
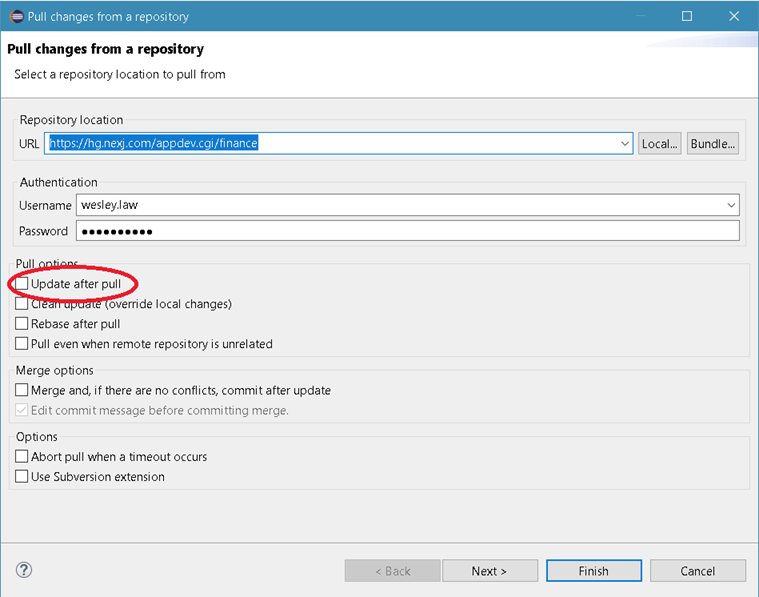
Ensure that the Update after pull checkbox is NOT SELECTED and click Finish.
Updating the workspace
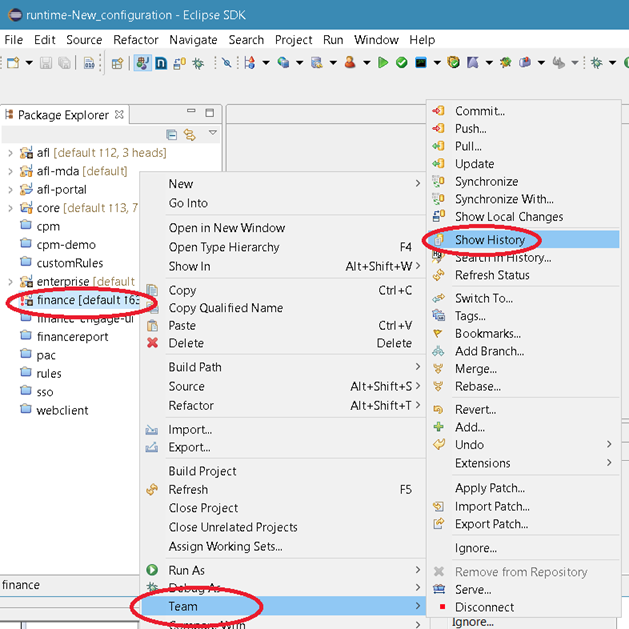
Open the project history.
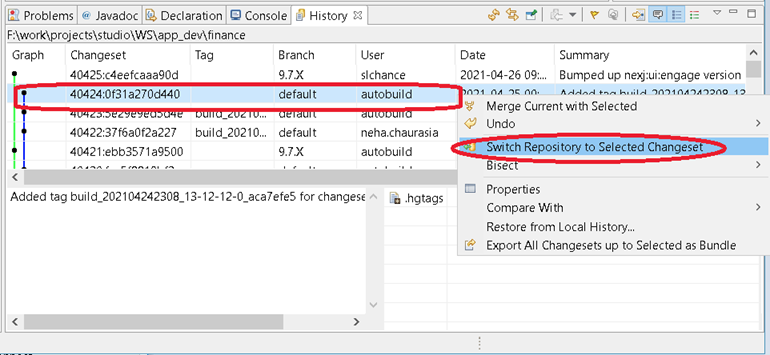
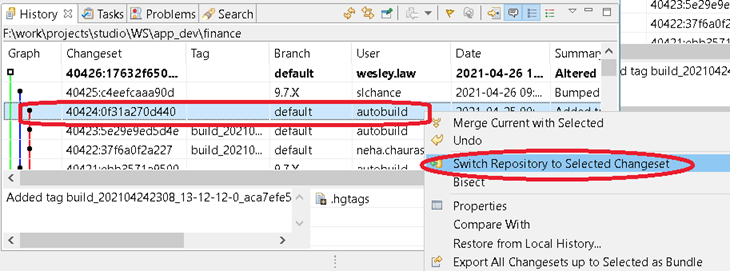
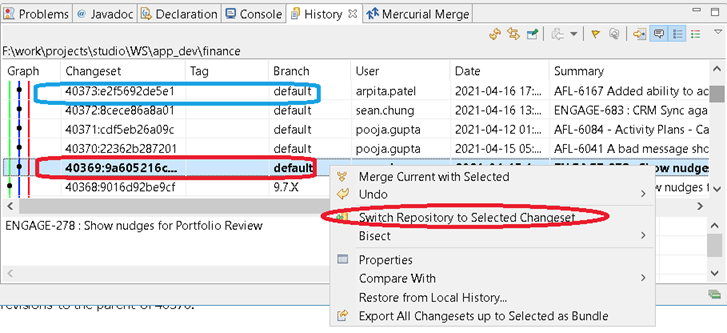
Select the latest revision in the branch you are working on, and then switch the repository to that changeset.
Performing development work
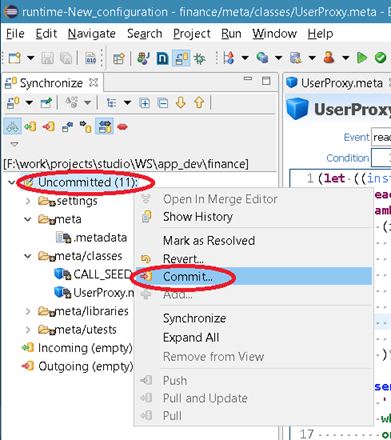
At this stage, a developer would work on new stories, or defects. It is necessary to pull and update from the repository before doing any work on the project. After making changes to various files, commit them from the team synchronizing view. Multiple files can be committed at once.
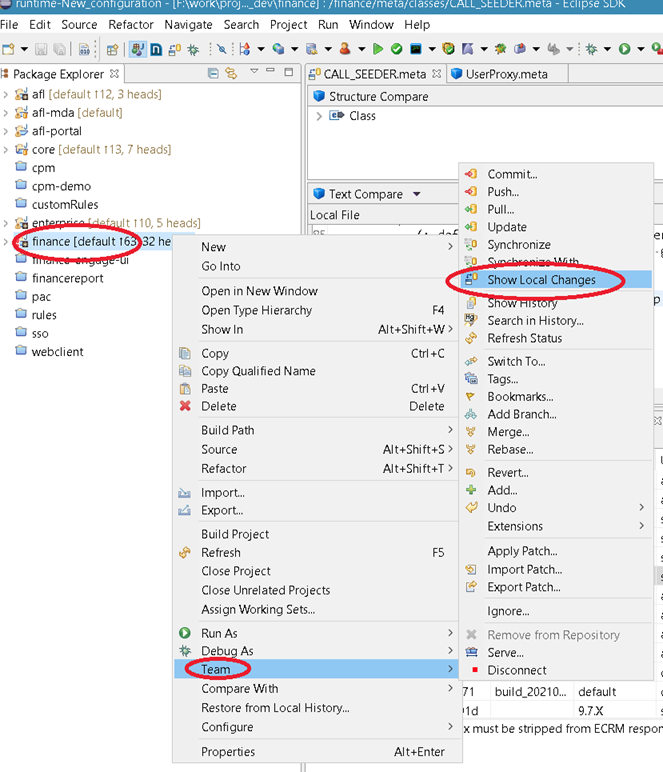
Select Show Local Changes to see which files you have changed.
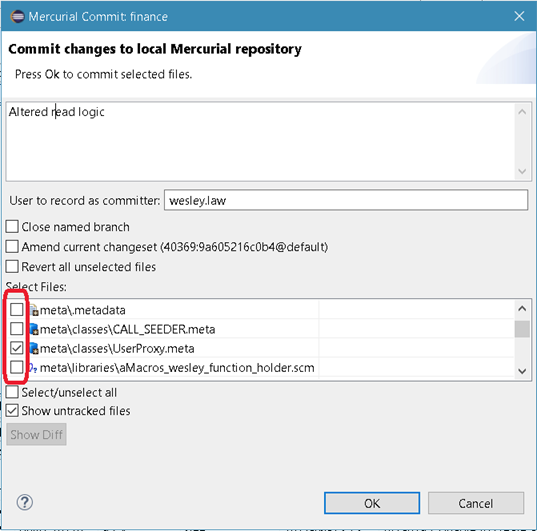
Right-click the project and select Commit.
Commit your work frequently to avoid losing work.
As you do more work on this changeset, commit your work with Amend current changeset selected to ensure that your work is backed up.
Rebasing development work
While doing development work, the rest of the team may have checked in code. When this happens, you must rebase your work on top of the work that the rest of the team has done. Repeat the earlier steps to perform another pull.
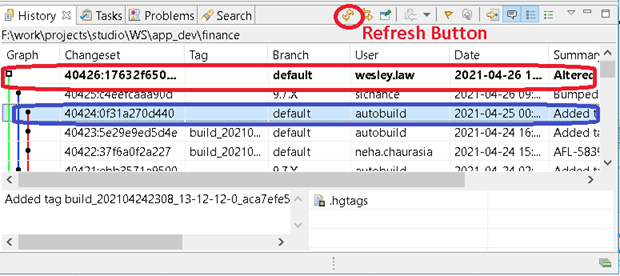
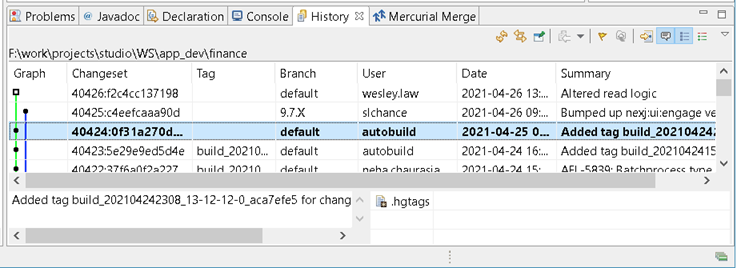
In Eclipse, refresh the history view to reveal the recently pulled changesets. You will be able to see your own changeset in one branch, and the work that the rest of the team has done in a separate branch. In the following example, the blue changeset is the work done by the rest of the team:
Before pushing your work to the repository, your work must be rebased onto the latest changeset. In this example, changeset 40426 is the local development work. Changeset 40424 is the last change that the rest of the team checked-in. Changeset 40426 must be rebased on top of 40424. Switch to the latest revision that the team has pushed before attempting the rebase.
When you switch revisions, you lose any work that isn’t committed.
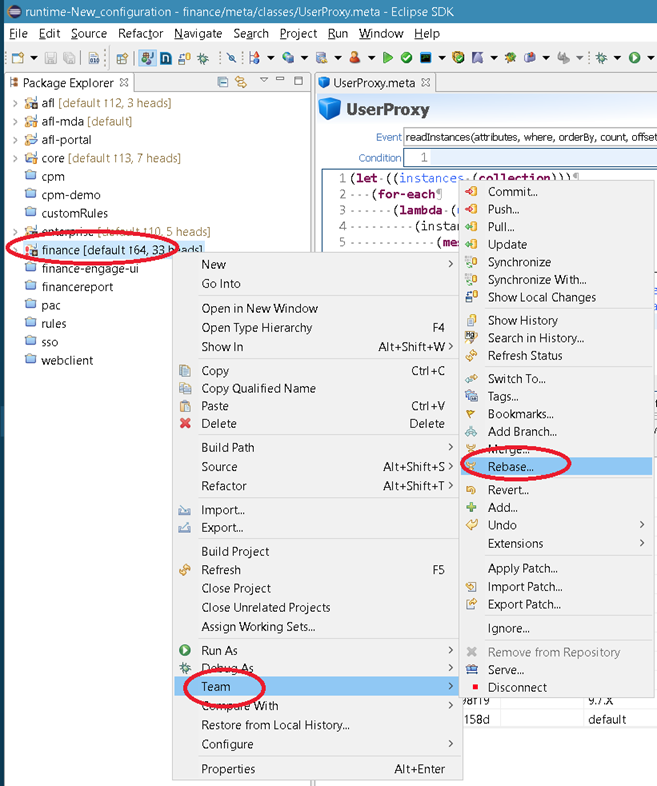
Switch to the Java view, right-click your project, and select Rebase.
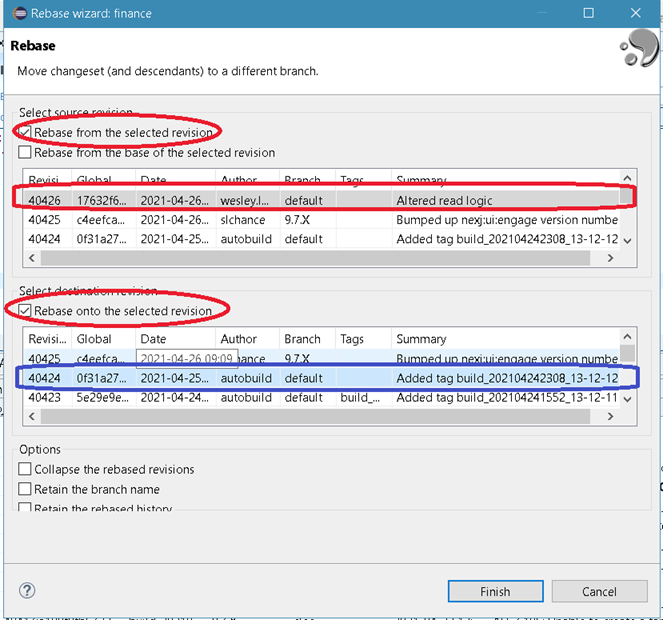
Select Rebase from the selected revision. As noted from before, revision 40426 was the revision with our own work, and revision 40424 was the latest code pulled from the repository. Select Rebase from the selected revision and select your revision from the top pane. Then select Rebase onto the selected revision. In the lower pane, selected the revision that was pulled.
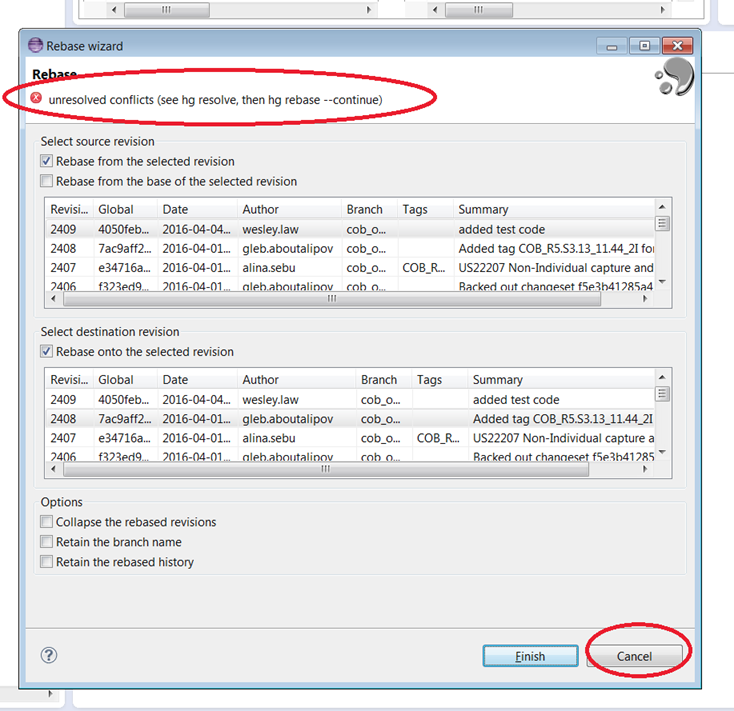
In some cases, you may need to handle a file conflict. If that occurs, click Cancel. If there is no file conflict, then the rebase will be finished at this point.
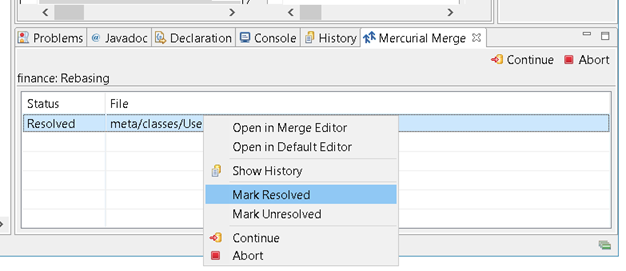
After manually resolving any conflicting files, mark them as resolved. If there are more than one conflicting file, then the same process will have to be repeated until all conflicts are resolved.
After finishing the rebase, the changeset with your work will now be on the same branch as the work that the rest of the team had done.
Performing functional and code reviews
After getting your code to behave in the intended manner, your work must be shown to a QA tester, and the product owner to ensure it meets expectations from a functional point of view.
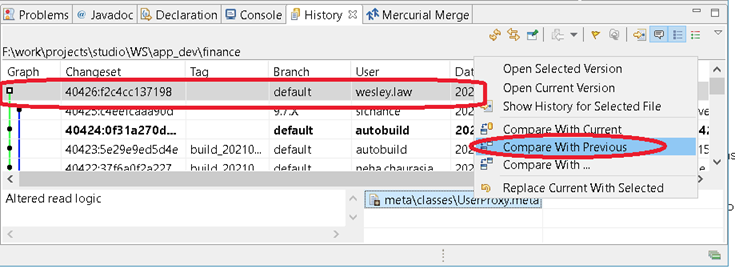
After a functional review, a code review must be done. From the Team Synchronizing view, select your changeset, right-click the altered file, then select Compare With Previous. The reviewer must see all files that are changed and approve of the changes before continuing.
Pushing a changeset
Pushing a changeset sends the code you have written to the repository where other developers can pick it up.
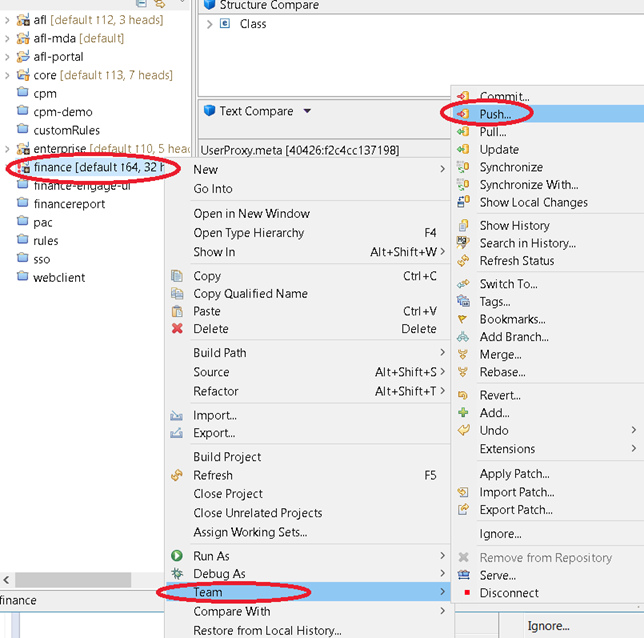
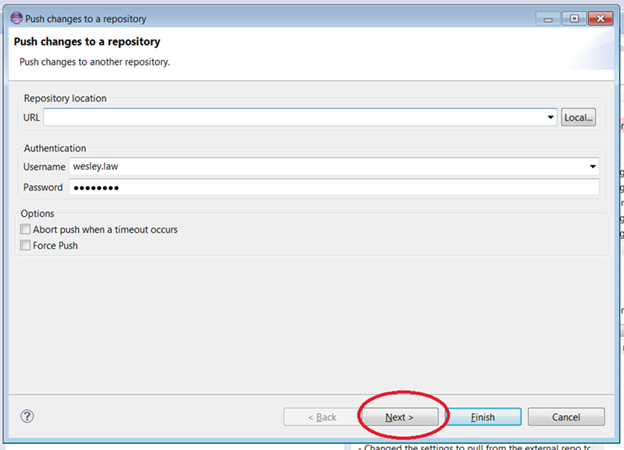
Right-click the project and select Push.
Click Next when prompted.
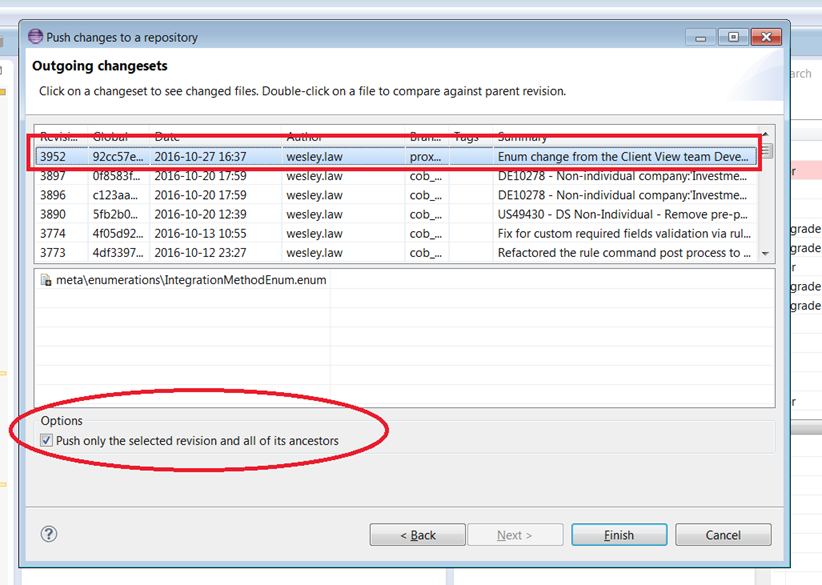
Select the changeset to push and ensure that Push only the selected revision is selected. Then click Finish.
Ensure that Push only the selected revision and all of its ancestors is selected.
Using advanced techniques
Adding the Mercurial executable to the environment path
There are some things that can be done in Mercurial from the command line that cannot be done from the Eclipse plugin. It is highly recommended to add Mercurial to the environment PATH variable so that it can be used from the command line. If TortoiseHg is installed, then this can be skipped.
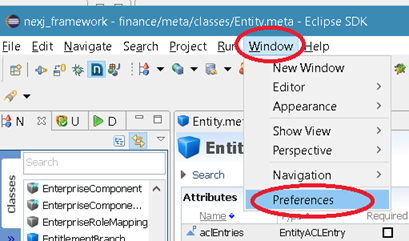
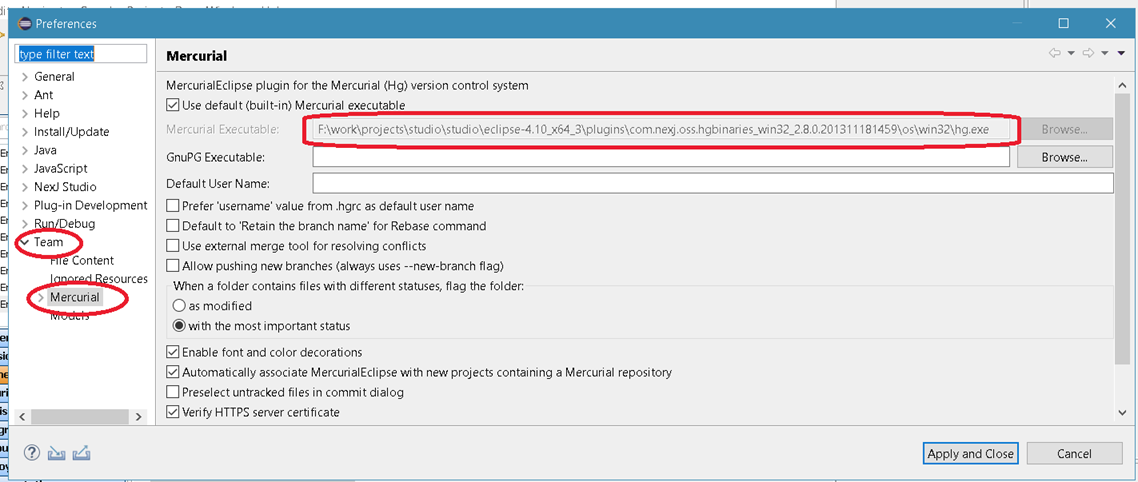
After installing the Mercurial plugin in Eclipse, navigate to the Preferences page.
Locate the built-in Mercurial executable from the Hg Plugin and copy this file path.
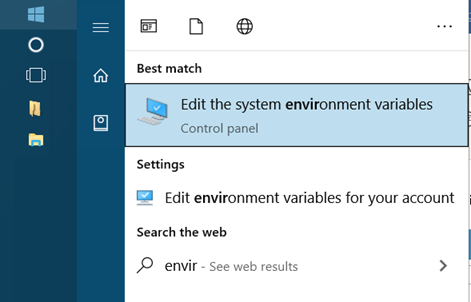
Select the start button in Windows, type in environment variables, and select Edit the system environment variables.
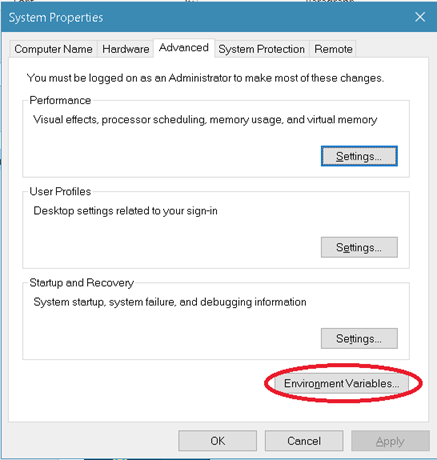
Click Environment Variables.
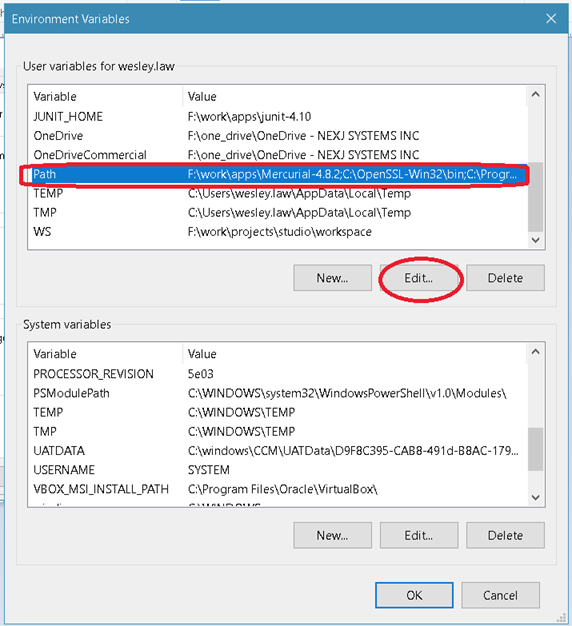
Find the Path variable and click Edit.
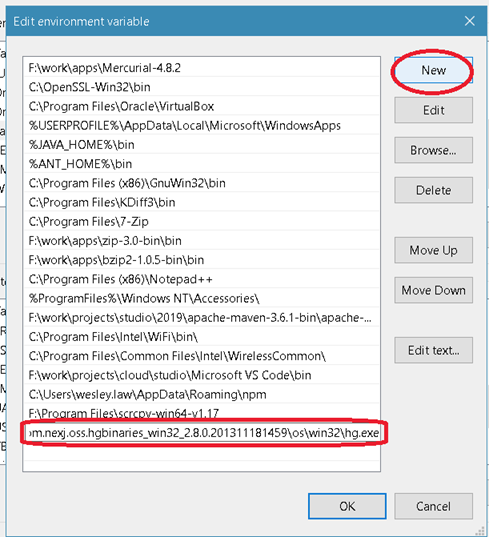
Paste in the path to the hg.exe file that was copied from Eclipse.
Recovering accidentally stripped changes
In the case that you have accidentally stripped a change, you can retrieve it by using the command line.
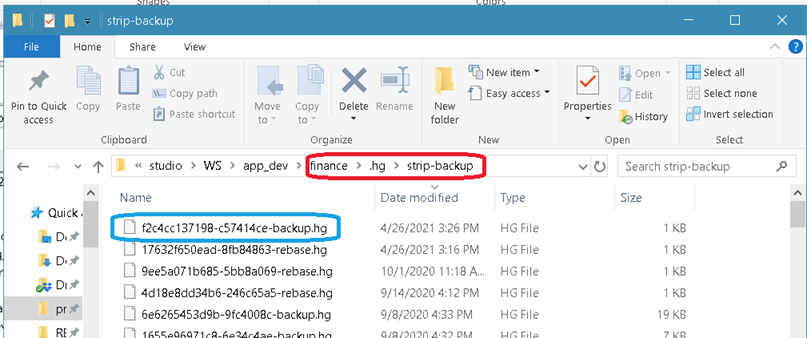
Open a file browser and navigate to the project folder. In the project there should be a strip-backup folder. If you sort by date, a backup of the last strip should be found. Copy the full file path of the backup file.
Open the command prompt and use the cd command to change directory to the project folder.
Example:
cd "c:\work\ws\finance"
Then use the hg unbundle command to restore the backup.
hg unbundle "C:\work\ws\finance\.hg\strip-backup\f2c4cc137198-c57414ce-backup.hg"
Altering the commit message
If you’ve accidentally made a typo in your commit message, you can use the --amend option without making any file changes. When committing from the Eclipse UI, you need to make at least one file change to amend a commit, but using the command line bypasses this constraint. This does not work on changes that have already been pushed.
Open the command line and change directory to the project folder.
Example:
cd "c:\work\ws\finance"
Next enter:
hg commit --amend
You will be prompted with a text editor to make any changes to the commit message. After saving the changes and closing the editor, the new message will take effect.
Exporting a committed changeset as a patch
Sometimes you may need to port a changeset from one branch to another. One way to accomplish this is by exporting that change as a patch, and the applying it to the desired branch. This can also be used as an alternative to rebasing.
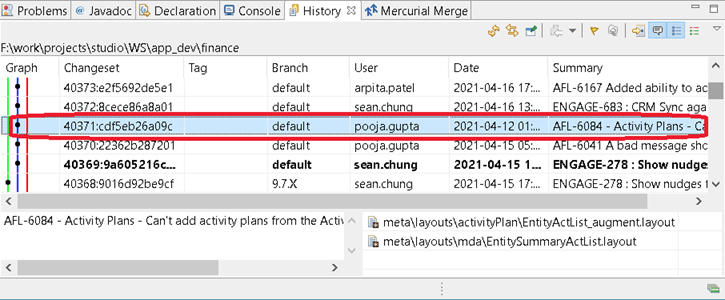
First, identify the changeset you want to export. The following example uses 40371.
Open the command line and change the directory to the project folder.
Example:
cd "c:\work\ws\finance"
Afterwards, use the hg export command to create a patch. Replace 40371 with the actual revision you want to export. The following example exports the patch to the c:\temp folder.
hg export -r 40371 -o "c:\temp\finance_40371.diff"
Collapsing multiple changesets into a single changeset
Sometimes, you may be working on a feature on your own personal unnamed branch, and you want to export all the changes in that branch into a single changeset for code review. This technique can also be used to examine the difference between two code branches.
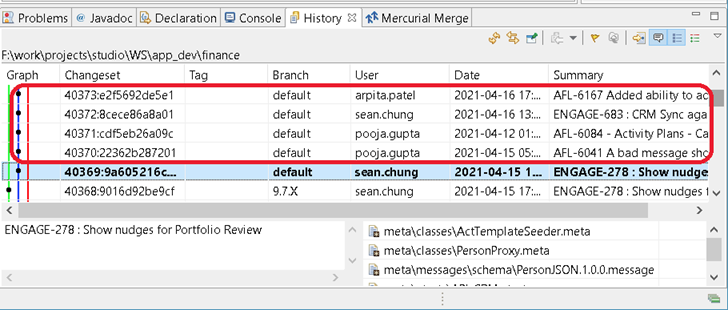
In this example, we will export the changes from 40370 to 40373 into a single patch.
Open the command line and change directory to the project folder.
Example:
cd "c:\work\ws\finance"
From the project folder, use the hg diff command to create a diff file between the parent of the first change, and the destination change. In this example, the first change we want to export is 40370, so we use the parent of 40370 as the first argument.
Example:
hg diff -r 40369 -r 40373 > "c:\temp\finance_40369_40373.diff"
Moving committed code to an uncommitted state
Sometimes, you may have committed something too soon and decided to make additional changes to it. This method can be used as an alternative to exporting a patch. Using the same example as above, assume you want to take the file changes from 40370 to 40373 into an uncommitted state.
First change the revisions to the parent of 40370.
Open the command line and change the directory to the project folder.
Example:
cd "c:\work\ws\finance"
Next, use the hg revert command to change the workspace files to the state of 40373.
Example:
hg revert -r 40373 --all
A list of all the files changed will appear. From here, you can make any additional changes as needed, and then make a new commit with the combined changes.
Handling corrupt revisions: No phase for unknown node
Sometimes when doing a rebase or commit, Mercurial may crash during the operation. To resolve this issue, you will need to backup the work into a patch, strip out the changeset, then re-apply the change as a patch.
Ensure that the strip and rebase extensions are enabled. For more information about enabling extensions, see Set up common extensions.
[extensions]
strip =
rebase =
Open the command line and change the directory to the project folder.
Example:
cd "c:\work\ws\finance"
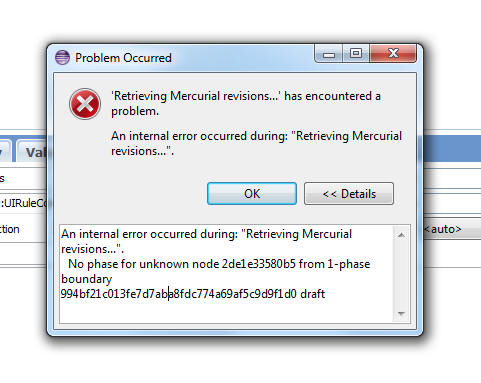
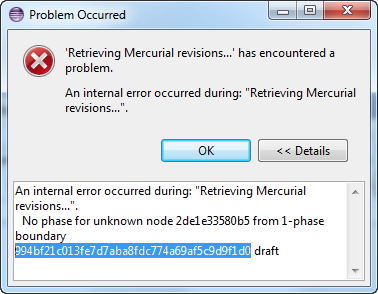
Highlight the erroneous changeset, and copy it.
In this case, 994bf21c013fe7d7aba8fdc774a69af5c9d9f1d0 is the erroneous changeset.
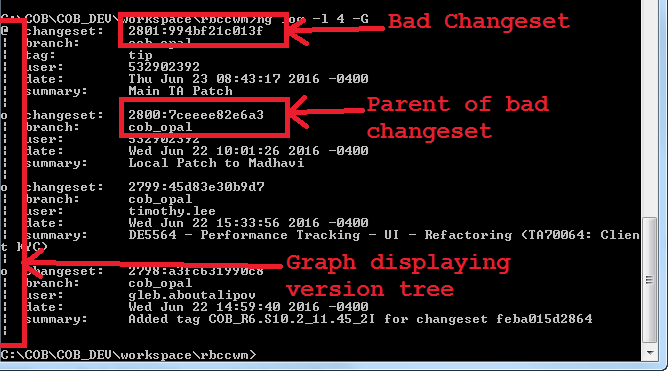
Use the following command to list the last 4 changesets, and identify the bad changeset, along with its parent. The graph will draw a line between the bad changeset and its parent.
hg log -l 4 -G
Export the patch using hg diff. Replace the parent and bad changeset as needed.
hg diff -r 7ceeee82e6a3 -r 994bf21c013fe7d7aba8fdc774a69af5c9d9f1d0 > c:\temp\tmp.diff
Next, strip out the corrupted changeset.
hg strip –r 994bf21c013fe7d7aba8fdc774a69af5c9d9f1d0
Re-apply the changeset from the patch.

