
React rendered controls with webpack
Learning objectives
- Understand how to integrate webpack into your build process in order to streamline the development of React with AFL, using modern build techniques.
Adding a new React component in AFL
In this lesson, we will build a Hello World card as a React component and display it in an AFL portal workspace.
You will:
- Write a Hello AFL portlet in React.
- Expose the portlet to AFL using AMD (Asynchronous Module Definition).
- Add the Hello AFL portlet to
libexport.jsso that webpack knows what to bundle. - Use webpack to bundle all developer defined portlets into
reactComponents.js. - Reference the newly created Hello AFL portlet in a workspace.
Using webpack improves development velocity, since in development mode, it watches the changes to the portlet definitions and updates reactComponent.js. A browser refresh picks up the changes.
Note
If the directories mentioned in the following instructions don't exist, you will need to create them.
Learning activity
The react-components project is dependent on React, and is the main project that will be modified in this learning module.
In this learning activity, you will insert your new Hello AFL Portlet.
- Press Ctrl+Shift+r and type
react-components/meta/.metadatato open the.metadatafile of the react-components project. Add the following code to the
Metadataelement.<Mixins> <Mixin namespace="nexj:model:react"/> </Mixins>The
Mixin namespaceadded to the .metadatafile above, is derived from thenamespacein the react project'smetadatafile as seen in the following:<Metadata name="React" namespace="nexj:model:react" revision="16.6.3" version="16.6.3"/>
- Press Ctrl+Shift+r and type
training/meta/.metadatato open the.metadatafile of the training project. If the react-component project has not already been added as a mixin to your training project, add it by inserting the following code into the
Mixinselement:<Mixin namespace="nexj:model:react-components"/>
This makes the training project aware of the react-components project files. The resulting file should look similar to the following:
training/meta/.metadata<Metadata baseChecksum="16858b84" baseNamespace="http://www.nexjsystems.com/ns/finance" baseVersion="1065.1307.165.53" name="training" namespace="nexj:training" revision="1.0" version="1.1065.1307.165.53"> <Mixins> <Mixin namespace="nexj:openapi"/> <Mixin namespace="nexj:model:finance-md"/> <Mixin namespace="nexj:model:afl"/> <Mixin namespace="nexj:model:portal"/> <Mixin namespace="nexj:model:cpm"/> <Mixin namespace="nexj:model:highcharts"/> <Mixin namespace="nexj:model:ckeditor"/> <Mixin namespace="nexj:model:dai:nexjcdc"/> <Mixin namespace="nexj:model:libphonenum"/> <Mixin namespace="nexj:model:afl-mda"/> <Mixin namespace="nexj:model:react-components"/> </Mixins> </Metadata>Optional Read
This
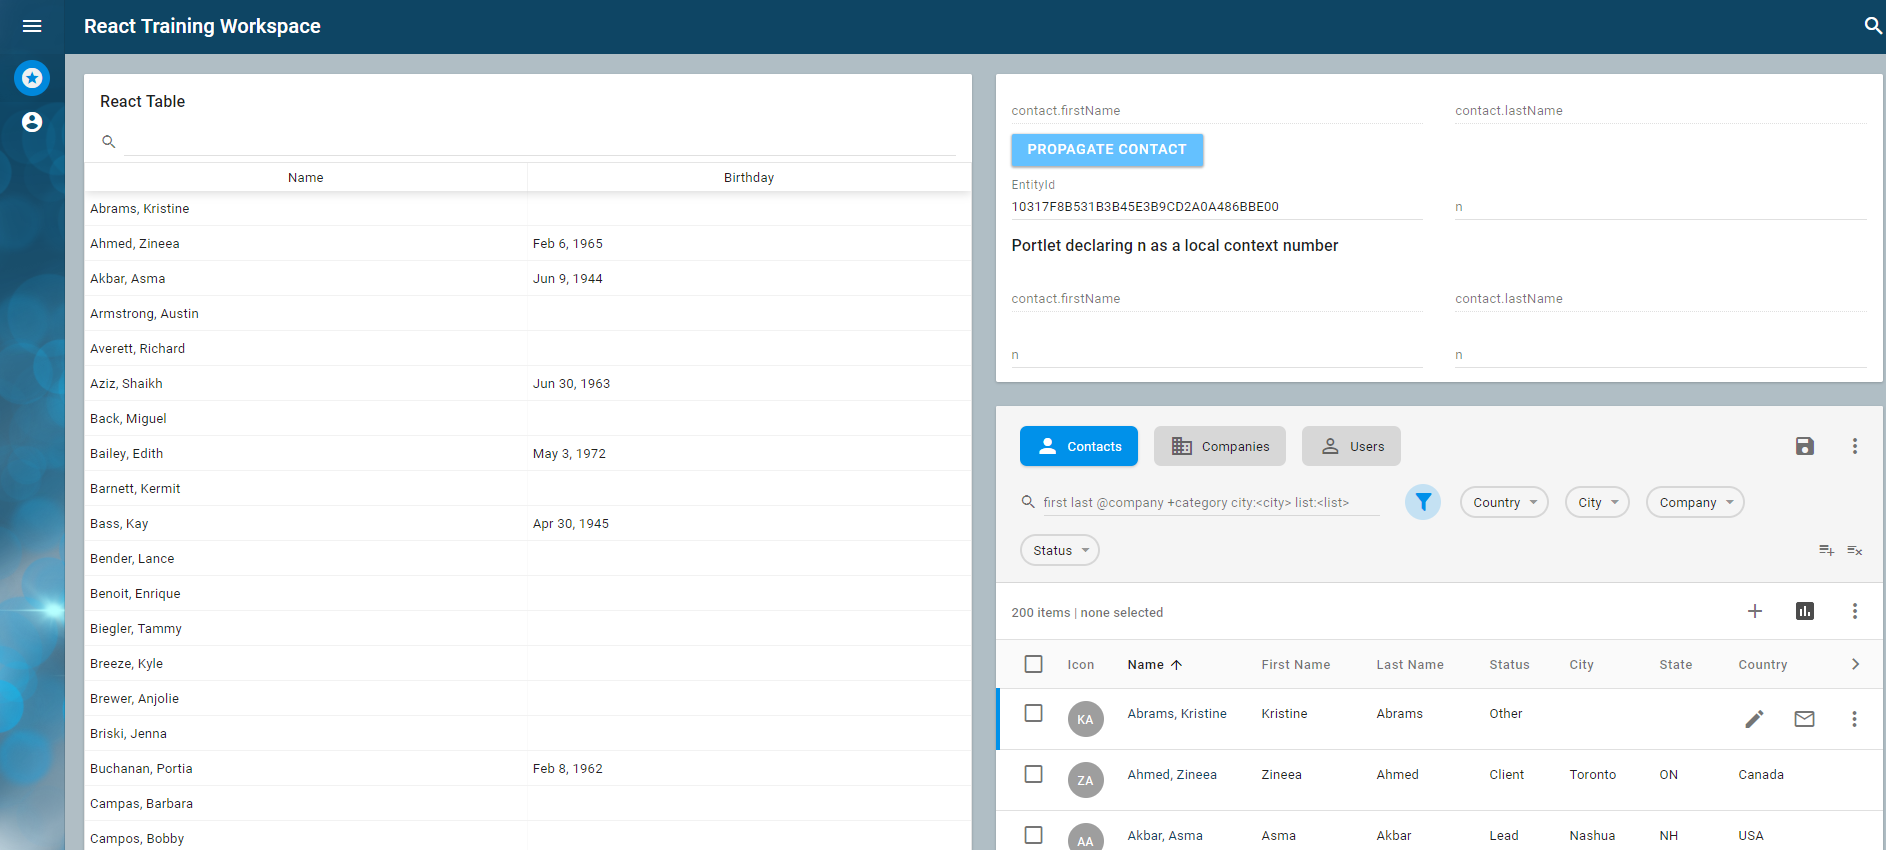
namespacewas used as amixinin the training project. If you press Ctrl+Shift+r, typereact-components/meta/.metadata, and open the file, you should see thenamespace.- Run the server console in NexJ Studio and in a browser, navigate to http://localhost:7080/training/ui/portal/training:React.
At a command prompt, navigate to
c:\nexj_studio\13.0-training\training\models\react-componentsand run the following to get all the required dependencies ready for development:npm install
Enter the following code to run the webpack build, and watch the process.
npm run build:afldev
You should see a "webpack is watching the files" message in the console as well as a new
reactComponents.jsfile getting generated into themodfolder of thereact-componentsproject.Create the Hello AFL portlet by adding a new
Hello.jsfile inreact-components/src/portletswith the following contents:react-components/src/portletsimport PropTypes from 'prop-types'; import React from 'react'; function Hello(props) { const { EntityId, aflCallBack } = props; return (<div>Hello World </div>); } Hello.propTypes = { EntityId: PropTypes.string, aflCallBack: PropTypes.func, }; Hello.defaultProps = { EntityId: null, aflCallBack: null, }; export default Hello;JSX is used in this React component, translation is handled by babel, and it is run by webpack as indicated in the following code snippet from
react-components/config/webpack.js.presets: ['@babel/preset-env', '@babel/react'],
Make the
hello.jsportlet available to AFL using AMD by adding a newhello.jsinreact-components/src/appwith the following contents:react-components/src/app/** Sample portlet in react, with "EntityId" context.*/ define("app/hello", ["nexj/ui", "ext/ui/react/portlet" , "nexj/ui/core" //plug-in for ui.Portlet et al. , "nexj/ui/bus"], //plug-in for ui.ContextValue function( ui, reactPortlet) {"use strict"; return function() { var contextId = new ui.ContextValue("EntityId"); console.log("about to create Hello portlet/table views, contextId = ", contextId); return ui("Portlet", {children: [ ui(reactPortlet.Portlet, { contextId: contextId, reactComponentName: "Hello", aflCallBack: function (e){ console.log("outer afl callback, e = ", e); } }) ]}); }; });Take note of the
app/hellostring in thedefine. You will use it when you reference this portlet in the workspace.With the portlet created, you need to instruct webpack to use it in the
reactComponents.jsbundle. Openreact-components/src/libexport.js.
The file should look like the code below.react-components/src/libexport.jsexport { default as Hello } from './portlets/Hello';Before saving the file, observe the npm run console. Save the file.
webpack should have rebuiltreactComponent.js.libexport.jswas defined as an entry point in the webpack config inreact-components/config/webpack.js.react-components/config/webpack.js.module.exports = { entry: './src/libexport.js', ...- Add the portlet into a workspace. Open
training/meta/workspaces/training/React.workspaceand switch to the source tab. In the XML file, you should see
Workspace,Page,Tab, andPortletRefelements. Insert the following code inside theTabelement and make it the top entry.training/meta/workspaces/training/React.workspace<PortletRef name="refHello" portlet="app/hello"/>
The resulting file should look like the following:
<Workspace caption="idsa.React.WorkspaceName" icon="icon:"> <Page name="pageHome"> <Tab caption="idsa.Portal.Summary" layout="cols:2 fluid:true" name="tabHome" type="grid"> <PortletRef name="refHello" portlet="app/hello"/> <PortletRef name="refReact" portlet="app/react"/> <PortletRef layout="off:1" name="refBus" portlet="app/bus"/> <PortletRef layout="off:1" name="refEntityList" portlet="mda:EntityNavigator"/> <PortletRef name="refAFL" portlet="app/chart"/> </Tab> </Page> </Workspace>Test displaying your Hello World card by:
- Pressing Ctrl+Shift+r, type
training, and open thetraining.scmfile. Pressing Ctrl+A and Ctrl+U to run the entire script in the Scheme console.
This is an important step in refreshing your workspace.
- In your brower, refresh
http://localhost:7080/training/ui/portal/training:React.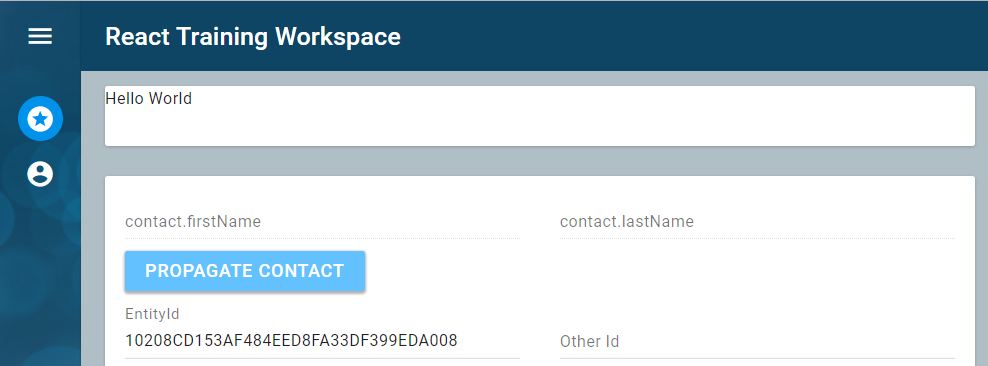
For an added challenge, try to get Hello World to display as Hello along with the contact name in context.
- Pressing Ctrl+Shift+r, type
Summary
In this lesson, we:
- Created a React AFL portlet.
- Exposed the portlet to AFL using AMD.
- Added the React AFL portlet entry in
libexport.js. - Referenced the name of the AMD in a Workspace.