
Structure: Portals contain workspaces contain portlets
Learning objectives
By the end of this lesson, you should:
- Understand the structure of a NexJ portal application.
- Know how to create a portal.
- Know how to create a workspace.
- Understand how portlets are arranged into navigators, banners, pages, tabs, drawers, workspaces, and portal applications to create the application structure.
Key concepts
The following concepts are mentioned in this learning module:
- Portlets are the basic UI components of an application. They present features to end users.
- Workspaces organize portlets by function into pages and tabs. For example, Contacts, Opportunities, and so on.
- The portal declares the application's structure, including its set of workspaces.
- NexJ Model Server serves the application at http(s)://<serverRoot>/ui/portal/<portalName>.
Learning activity
Open the application and see how it responds to resizing.
- Launch the mda:Contact portal application at http://localhost:7080/training/ui/portal/mda:Contact?theme=training, entering
wm1as your ID andnexjas your password. - Resize your browser to see how the application responds and changes its layout dynamically for desktops, browsers, and phones.
Portals, workspaces, and pages
The portal application contains a set of workspaces, each focusing on a specific function.
- View workspaces via the navigator drawer on the left. You have the option of selecting Home, Contacts, Schedule, Tasks, Document Manager, Opportunities, Service Requests, or Customize.
- Each workspace's portlets are arranged into pages and tabs.
- A workspace can have either a set of one or more tabs with portlets in them, also known as cards (for example, the Home workspace), or a navigator portlet with associated details (for example, the Contacts workspace).
- The navigator, such as the Contacts workspace Entity Navigator, provides filtering, paging, and navigation to detail pages.
Learning activity
On the Contacts workspace:
- Select Contacts in the navigator drawer on the left side of the page and filter by "Lamont".
- Click Tim Lamont's name in the data table. His contact detail page opens in the workspace area.

- The detail page contains a banner at the top and a series of tabs with portlets underneath.
- You can configure cross-cutting portlets such as notifications in the application drawer, on the right-hand side in this case. View these by clicking the bell icon
 .
. - There are more action icons in the toolbar, workspace actions (edit, set list columns, and so on), and the floating action button (FAB)
 . These are configured with events and actions to receive and handle end user interactions and will be discussed in our examples.
- Click the More Actions button
 in the banner of Tim Lamont's detail page, and select Edit to see his Edit dialog.
Dialogs can open full screen, or on top of other content. Use the Edit dialog to add, edit, provide, or collect information.
Context bus
Not visible is the context bus. Each workspace has a context bus on which context variables are placed. Portlets are unaware of each other except through the context bus. This is where they can exchange information about the current context (such as, who is the currently selected Contact), and events (such as, Navigate to the Schedule).
For example, on the Contacts workspace, EntityId is an important context variable. Whenever we change the currently selected contact from the Entity Navigator, the context changes and all interested portlets respond appropriately.
- Return to the Entity Navigator by clicking the Contacts back arrow
 and select Dee Lamont to go to her detail.
You can see that the banner, Bio, Activities, Notes, and so on, update with Dee's information.
Let's take a look at some of what is going on behind the scenes.
Learning activity
Get Tim Lamont's ID.
Get Tim's id
If you have Tim's ID from the previous section, use the one you have.
If not, follow this link and get Tim's ID:
http://localhost:7080/training/json/Person?attributes=(firstName lastName)&where=(and (= firstName "Tim") (= lastName "Lamont"))&$indent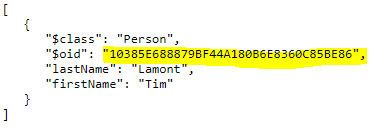
- Copy and paste Tim's ID into the EntityId of the following URL.
http://localhost:7080/training/ui/portlet/mda:EntityDashboard?EntityId=1066019F25479045B1B444333DB23350D0
You should see the banner in context for Tim.
The Entity Dashboard portlet's EntityId context is set by the query string parameter. This is what the portal server's context bus does for all interested portlets.
Not seen here is the Broker portlet, a non-visible portlet that provides client business logic and orchestration.
Broker Portlet Example
When you click on the View All button on the My Tasks portlet on the Home workspace, a navigate event is fired through the context bus. The broker portlet hears the event and handles it by navigating to the Tasks workspace.
You should now have a general idea of the structure of a portal application.
More Info
For additional information about these concepts, see Application pattern.
Creating a portal
To learn more about portals, see Portal.
Learning activity
To create a portal:
- In NexJ Studio, right-click on Portals in the navigator and select New Portal.

Name your portal
training:Contact

Namespaces
When naming MODL elements, we recommend you use namespaces. You can use a colon (:) to indicate a namespace and can have any level of namespacing. In the example above, we use the training namespace in our name
training:Contact. Namespaces are translated into folders in the file system.Set the portal's caption. While you can just enter some text, we recommend that you set the captions to string IDs to support translation. In the Caption textbox, select the picker button
 and the Add button
  to add a new string with an ID of
 idsa.training.portal.Contact.captionand a value ofMy Training Application.String Files
StringIDs are organized into string files. It is a best-practice to not re-use existing strings. Our approach is to keep strings pertaining to a particular module or file in its own string file. This simplifies code merging later. NexJ Studio currently has some rules for creating the files for strings automatically. We want all of our strings to go into the same file for our training work, so start all strings with
idsa.training. This automatically creates and maintains a file calledidsa.training.en.strings.In the Workspace Refs tab, add two workspaces. One with
Name=refHomeandWorkspace=mda:Home. Another withName=refContactsandWorkspace=mda:Contacts.The names
refContactsandrefHomecould be anything. The default names areworkspaceandworkspace1. We follow naming conventions to support finding views consistently when scripting and writing automated tests. The names of views are used to construct the HTML ID names for DIVs and other elements. For information about the standards for naming, see Metadata Naming Conventions.Save your work and restart your server.
When restarting your server, make sure you stop it first with the
 button. Then start it by clicking the
  button or the Run > Run Scheme Console > Server Console menu item.
Re-seed the portal
Each time you make structural changes to your application (changes to portal or workspace files), you must re-seed the changes in your design to the database. There is a script for this.
Learning activity
- In NexJ Studio, open the
training.scmfile.
It is located in theResources/Scratchpadsfolder in the Navigator or you can search by filename (Ctrl+Shift+R). To run the script, copy and paste it into the console, or press Ctrl+U in the editor. Ensure your server is fully started.
Pressing Enter
If you don't see "Portal re-seeding completed" or you receive an error message in your console after running the script, press Enter in the console. You may have missed pasting a carriage return at the end and it is still waiting to be run.
- Change your browser's URL to http://localhost:7080/training/ui/portal/training:Contact.
This is the URL for calling portal applications: <serverRoot>/ui/portal/<portalName>
Depending on your browser size, your application should appear similar to the following:
If you get a Loading... message that doesn't go away, run the training.scm script mentioned above and try again.
Creating a workspace
For background reading about workspaces, see Workspace.
Learning activity
- In NexJ Studio, right-click on Workspace in the navigator, select New Workspace, and name it
training:Sandbox
- On the root workspace element in the Outline view, set the caption property in the Properties view to a stringid called
idsa.training.workspace.Sandbox.captionwith a value ofSandboxand the icon property toicon:attach_money In the Outline view, select Workspace.
- In the Properties view, click caption, and:
Click the ellipsis button to open the Select String dialog, and add a new string with an ID of
idsa.training.workspace.Sandbox.caption, and a value ofSandbox.- Confirm the caption value is set to this new string.
In the Properties view, set the icon value to
icon:attach_money.Icons
You can enter icons by hex value as
icon:#E84Dor by name asicon:ac_unit. A list of names and hex values are available at https://github.com/google/material-design-icons/blob/master/iconfont/codepoints and you can find a list of available icons at https://material.io/tools/icons/?style=baseline.You can also use string.ids from the model made for this purpose, found in
Resources/Strings/mda/icon.en.string.- On the empty workspace, right-click in the Outline view to Insert Page.

- On the page element, right-click and select Insert Tab.

On the tab element, insert four
portletRefsand set their portlet properties toapp/chart, mda:ChartPipelineFunnelChart, mda:ChartPipelineByProductPieChart, andapp/radio.Insert portletRef
You can insert portletRefs on a tab by right-clicking on that tab in the layout editor, or in the Outline view.

Or, as with all model elements, you could enter the XML directly in the source view as follows:
	  ...
      <Tab name="tab">
         <PortletRef name="refChart" portlet="app/chart"/>
         <PortletRef name="refChartPipelineFunnelChart" portlet="mda:ChartPipelineFunnelChart"/>
         <PortletRef name="refChartPipelineByProductPieChart" portlet="mda:ChartPipelineByProductPieChart"/>
         <PortletRef name="refRadio" portlet="app/radio"/>
      </Tab>
      ...
Go back to your portal file and add a new workspace with
name=refSandboxandworkspace=training:Sandboxat the top of your WorkspaceRefs.- In NexJ Studio, click on Portals in the navigator and open
training:Contact portal. - In the Workspace Refs tab, add a workspace ref, entering
refSandboxin the Name field andtraining:Sandboxin the Workspace field. - Using the up arrow key, move refSandbox to the top of the list of workspace refs.
- Save your changes.
- In NexJ Studio, click on Portals in the navigator and open
Select the Source tab to view your XML. It should appear as follows:
training:Contact.portal<Portal caption="idsa.training.portal.Contact.caption"> <WorkspaceRef name="refSandbox" workspace="training:Sandbox"/> <WorkspaceRef name="refHome" workspace="mda:Home"/> <WorkspaceRef name="refContacts" workspace="mda:Contacts"/> </Portal>
training:Sandbox.workspace<Workspace caption="idsa.training.workspace.Sandbox.caption" icon="icon:attach_money"> <Page name="page"> <Tab name="tab"> <PortletRef name="refChart" portlet="app/chart"/> <PortletRef name="refChartPipelineFunnelChart" portlet="mda:ChartPipelineFunnelChart"/> <PortletRef name="refChartPipelineByProductPieChart" portlet="mda:ChartPipelineByProductPieChart"/> <PortletRef name="refRadio" portlet="app/radio"/> </Tab> </Page> </Workspace>Save your work. Instead of restarting your server, select Project > Metadata Hotswap > Reload All. Wait for "Finished reloading all metadata" to appear in your console, and re-seed the portal from
training.scm.Hotswap
As you make changes to Portlets (and to other UX elements), you can quickly see their impact on the application during development. Using Project > Metadata Hotswap > Reload UI or using the
 toolbar button, can save you a lot of time. Simply make your change, reload the server and when you refresh your browser, the change will be reflected.
If you go to the Sandbox workspace, you should see all four portlets stacked up.

Exploring the layout property
Note
Not to be confused with the Layout element, the layout property is a workspace tab property that controls the layout of any contained portlets.
Review the layout property documentation for Tabs and PortletRefs.
Learning activity
- In the Source tab, set your Sandbox workspace tab's layout property to
layout="cols:3"(<Tab name="tab" layout="cols:3">). Save your changes, re-seed the portal, and refresh your browser.
Your application should appear similar to the image below.
To help ensure a positive user experience, more than three columns should only be used in special design cases.
- Set the funnel chart's portletRef layout as
layout="off:1". - Save your changes, re-seed the portal, and refresh your browser.
You should see that the funnel wants to be offset from its neighbor by one.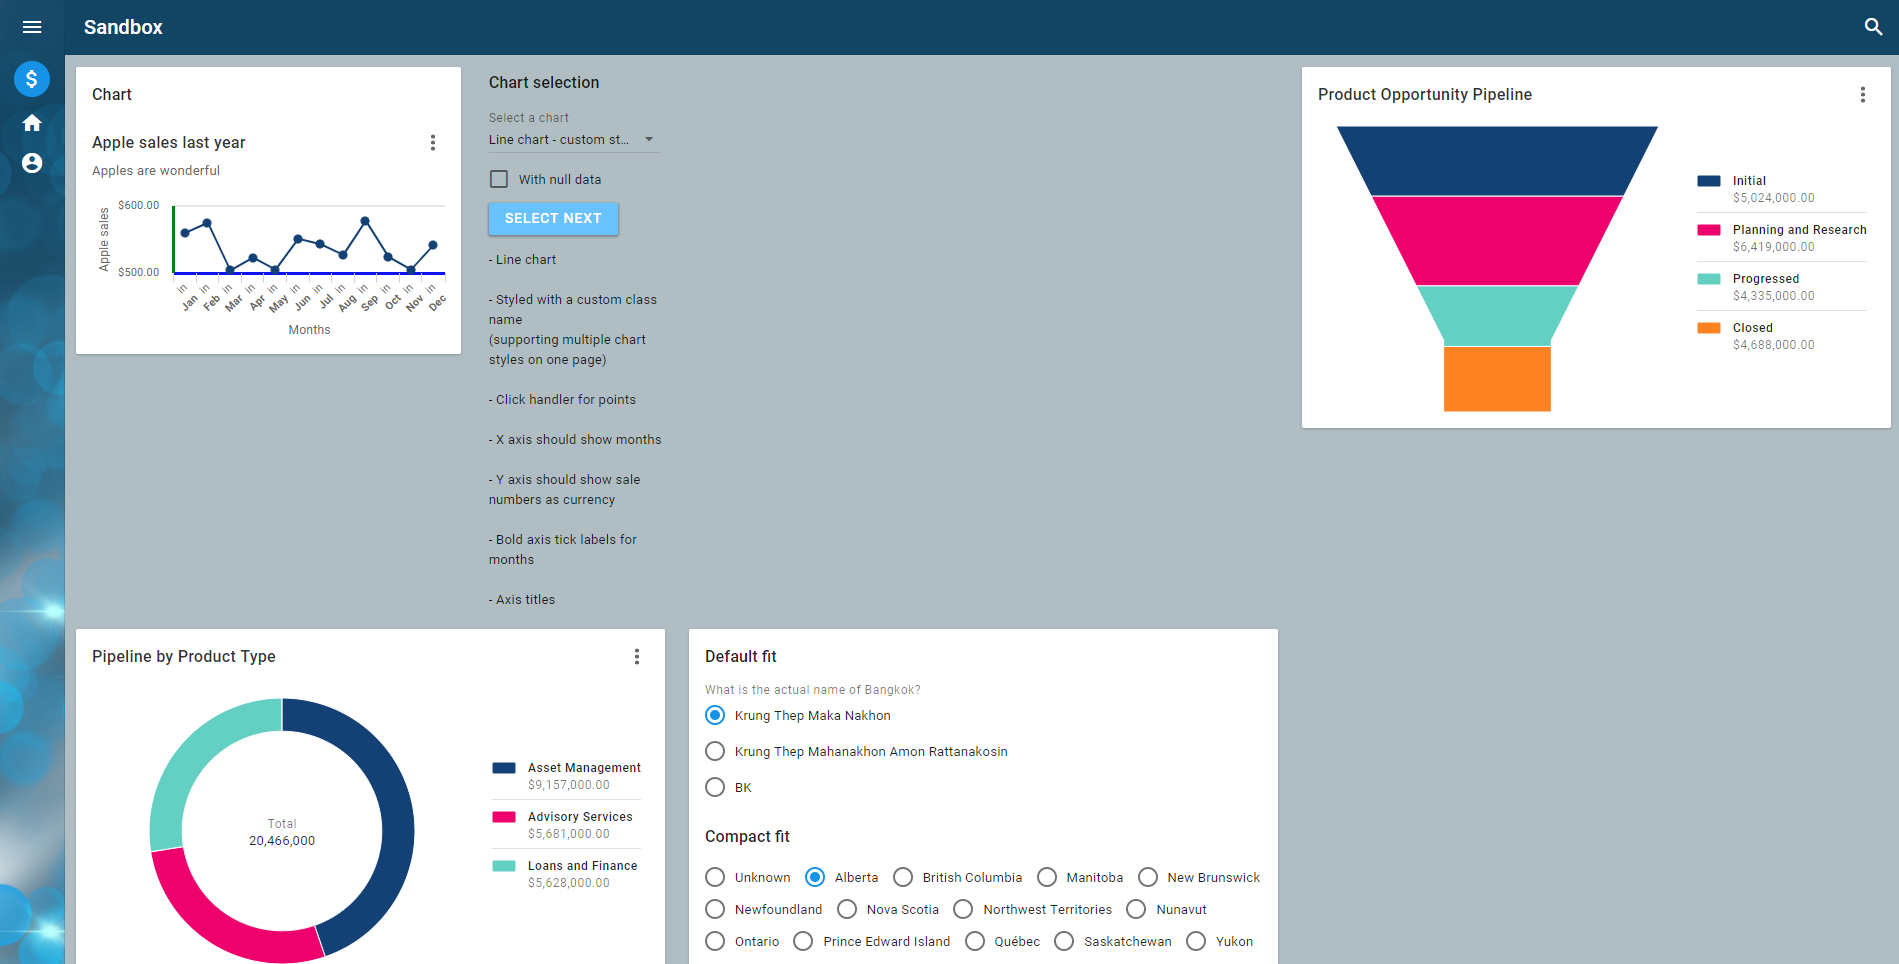
- Set the radio PortletRef's layout as
layout="span:2". - Save your changes, re-seed the portal, and refresh your browser.
You should see that the radio portlet spans two columns.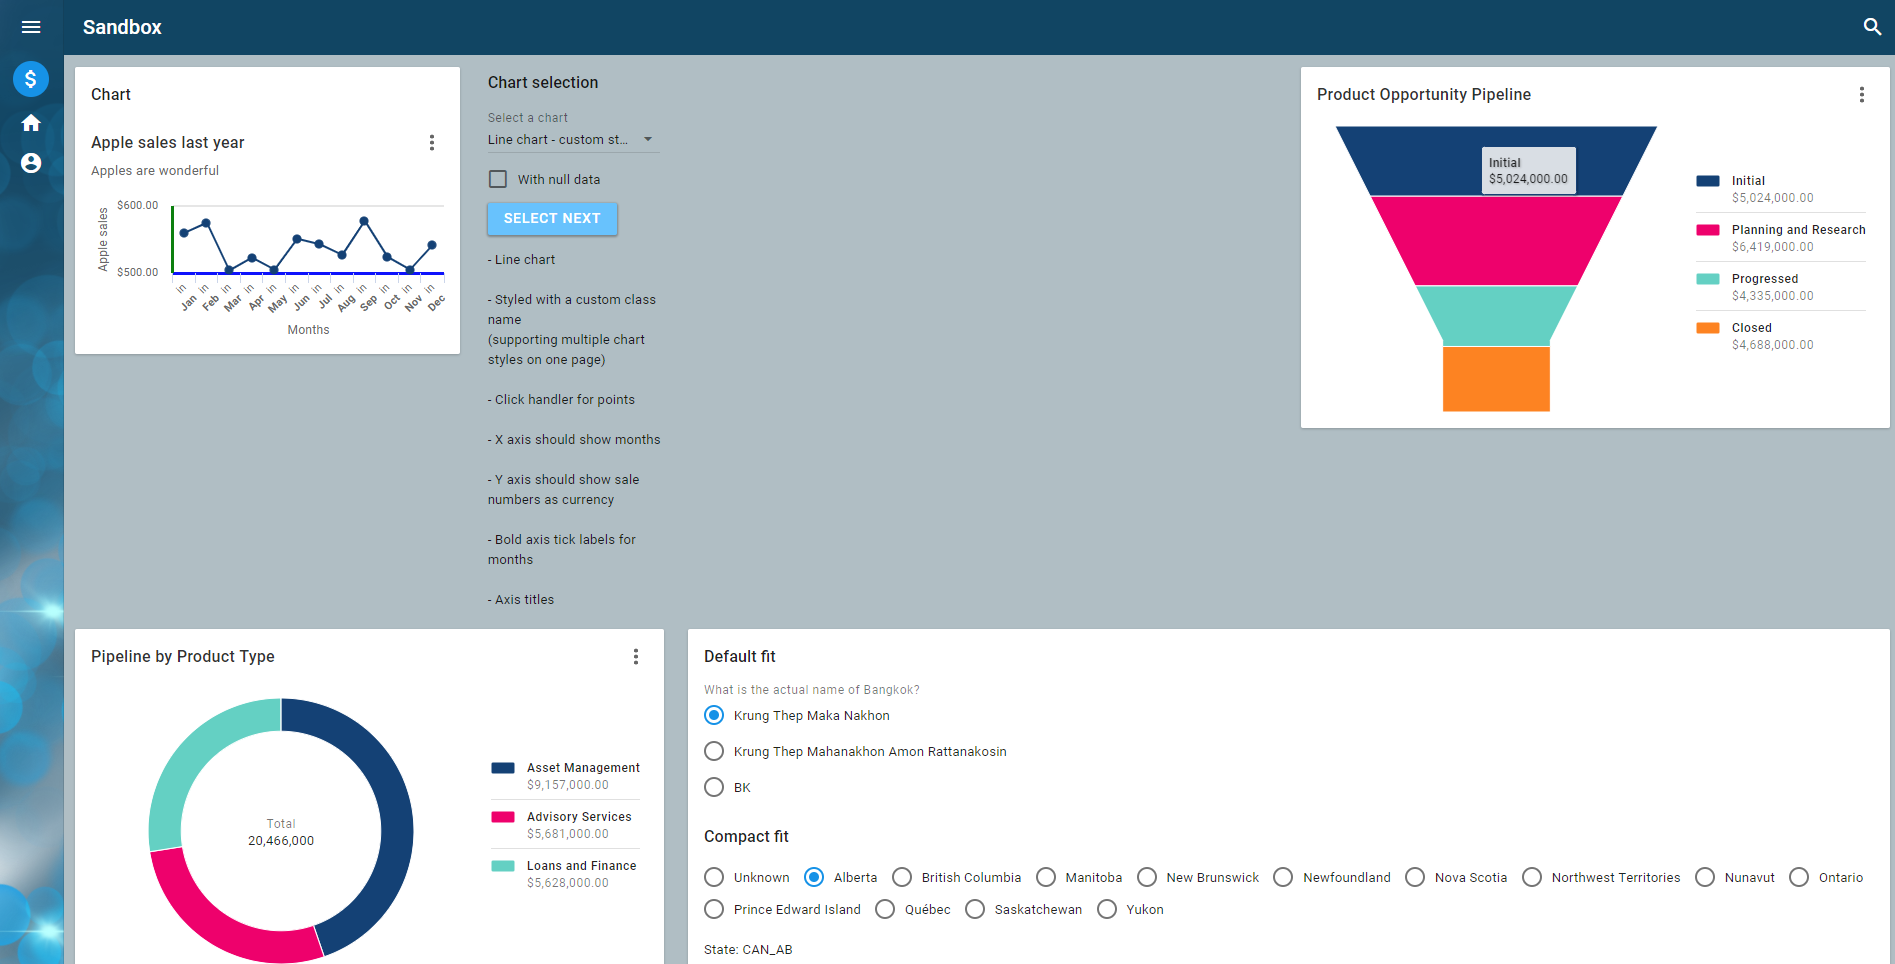
- Add
fluid:trueto the tab's layout so it looks likelayout="cols:3 fluid:true" - Save your changes, re-seed the portal, and refresh your browser.
You should see that the layout is much more intelligent and dynamic. - Resize your browser to see how fluid works.

- Add
layout="off:1"to the pie chart and remove thespan:2from the radio portlet.
Your XML should look similar to the following code:
<Workspace caption="idsa.training.workspace.Sandbox.caption" icon="icon:attach_money">
   <Page name="page">
      <Tab name="tab" layout="cols:3 fluid:true">
         <PortletRef name="refChart" portlet="app/chart"/>
         <PortletRef name="refChartPipelineFunnelChart" portlet="mda:ChartPipelineFunnelChart" layout="off:1"/>
         <PortletRef name="refChartPipelineByProductPieChart" portlet="mda:ChartPipelineByProductPieChart" layout="off:1"/>
         <PortletRef name="refRadio" portlet="app/radio"/>
      </Tab>
   </Page>
</Workspace>
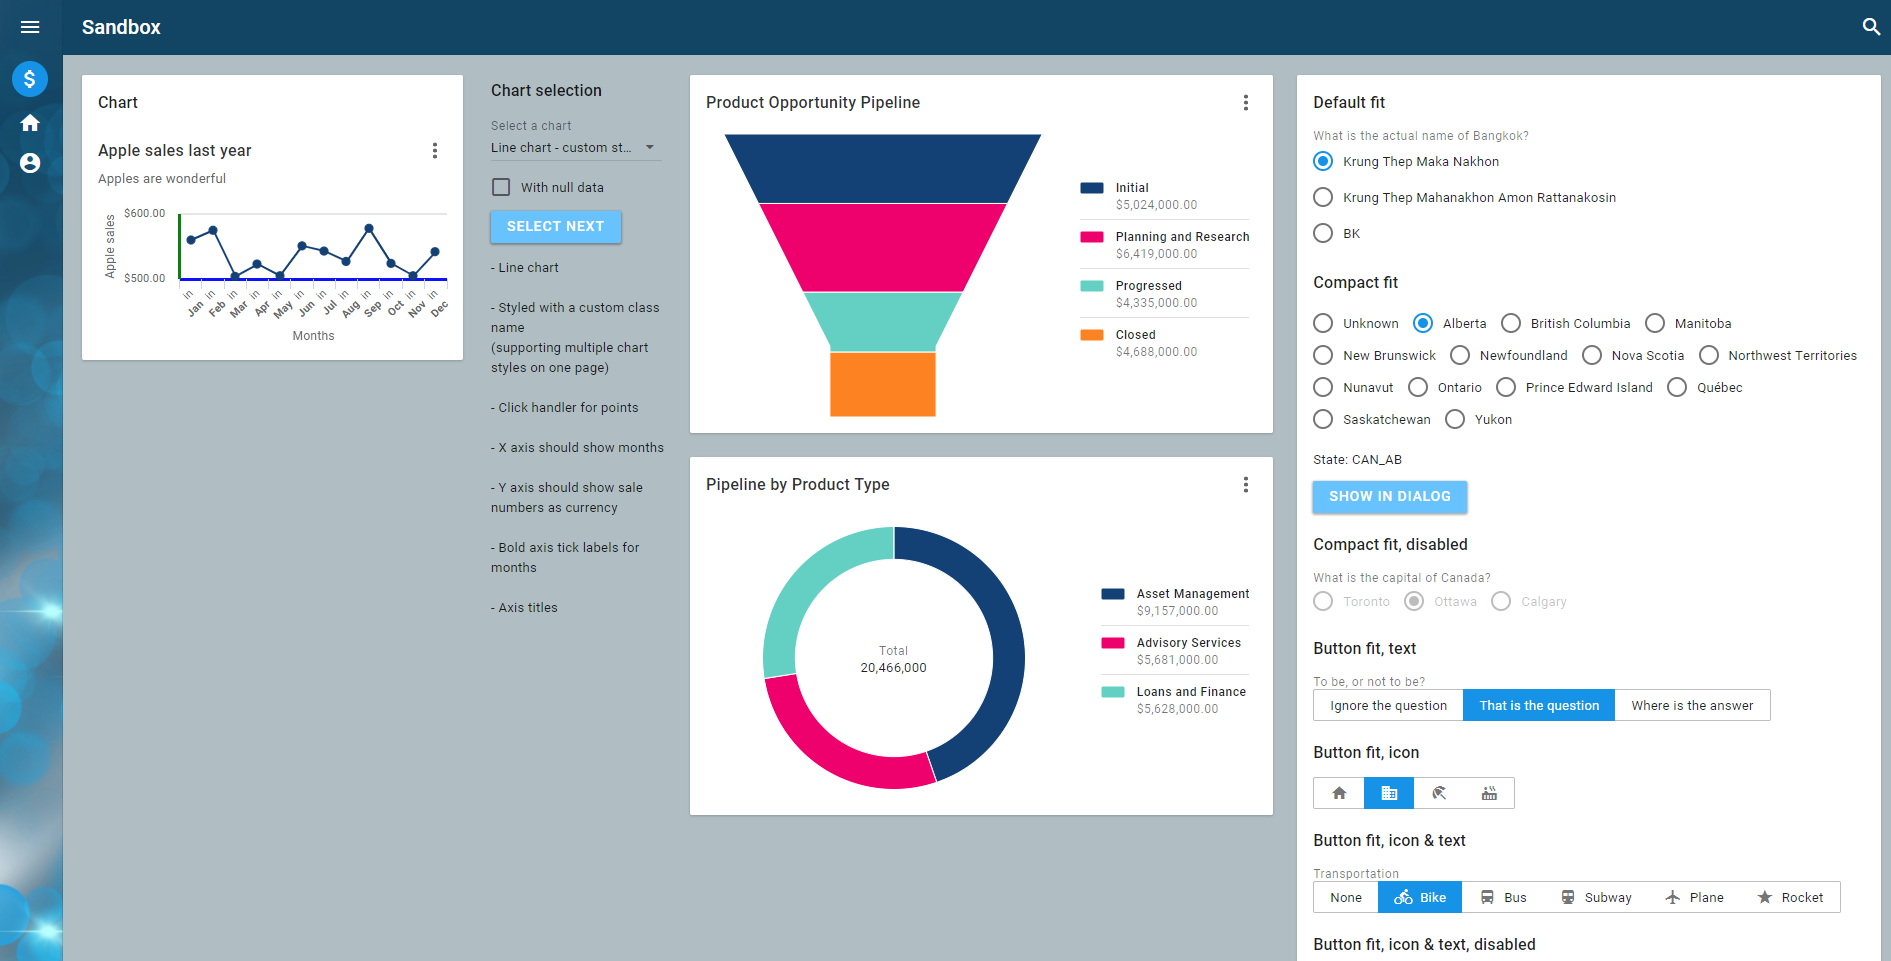
Your workspace should look similar to the image below:
Working with navigators, pages, banners, and tabs
A navigator is a portlet that typically contains a list of items and sets the workspace context based on user selection. It also raises a sysDetail event when you click on a link or a button from the list that then causes the portal to navigate to the detail page. You can add a Navigator to the top of your workspace in the XML or in the Outline view.
UIEvents
Events are raised from portlets through the context bus. They are an integral part of the Model-View-Controller pattern. Views can raise events that are handled by script on the controller. Some of these handlers are built into the system, for example, sysDetail, and some you will need to write for your feature's specific requirements. More on this later.
The page that gets displayed is based on the page's case property. This is either empty (always shows the same page), or a selector based on the class of the selected item.
Outline View
For the Outline View to work in NexJ Studio, you must be on the Overview or Layout tab of the editor. Outline view does not display if you are in the Source tab.
Learning activity
To add a navigator to the page:
- In the outline view, right-click on the Workspace element and select Insert Child > Navigator beginning.
In the Properties, set the name to
refSandboxNavigatorand the portlet tomda:OpportunityNavigator.
This produces the following xml element.<Navigator name="refSandboxNavigator" portlet="mda:OpportunityNavigator"/>
- Save your changes and re-seed the portal, and refresh your browser.
Your application should look similar to the following image.
This is a full featured navigator with filtering, favorites, list functionality, sorting. If you click on the opportunity name, you are taken to the Sandbox page we created earlier. The context set by the navigator isn't reflected because none of the detail portlets are listening for the OpportunityId context.
Next, we will replace the detail page with some portlets that do listen to the opportunity context.
Add a banner to your workspace by adding the following XML code above the tab element in the workspace editor's source tab.
<Page name="page"> <Banner name="refOpportunityDetailBanner" portlet="mda:OpportunityDetailBanner"/> <Tab layout="cols:3 fluid:true" name="tab"> ...- Save your changes, re-seed the portal, and refresh your browser.
- Click on an item in the list.
Your application should look similar to the following image.
Insert the following code in the Sandbox workspace XML to add all of the child tabs and portlets.
<Banner name="refOpportunityDetailBanner" portlet="mda:OpportunityDetailBanner"/> <Tab caption="IDS_DETAIL" name="spltDetail" type="grid" layout="cols:3 fluid:true"> <PortletRef name="refOppOverview" portlet="mda:OpportunityOverview"/> <PortletRef name="refOppProducts" portlet="mda:OpportunityProducts"/> <PortletRef name="refOppTeam" portlet="mda:OpportunityTeam"/> <PortletRef name="refOppContacts" portlet="mda:OpportunityContacts"/> <PortletRef name="refOppNotes" portlet="mda:OpportunityNotes"/> </Tab> <Tab caption="ids.activities" name="spltActivities" type="grid" layout="cols:1"> <PortletRef name="refOpportunityActivities" portlet="mda:OpportunityActivities"/> </Tab> ...- Save your changes, re-seed the portal, and refresh your browser.
While your application now has some opportunity portlets, most of the sample data opportunities are sparsely populated. Click on My Open Opportunities in the navigator to filter in more interesting ones.
Actions and drawers
Learning activity
Add an action to your Contact portal to see how a drawer is configured and works. This element should go before the WorkspaceRef elements in your portal file.
<Tool name="toolNotifications" caption="ids.notifications" icon="icon:notifications" event="setSidebar" parameter="NOTIFICATIONS"/>
Add a drawer. This element should go after the WorkspaceRef elements in your portal file.
<Drawer event="setSidebar" name="refNotifications" portlet="mda:NotificationDrawer"/>
- Save your changes, re-seed the portal, and refresh your browser.
Your application's Notifications should look similar to the following image, where the bell button can show and hide the Notifications drawer.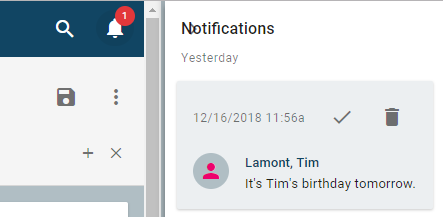
Broker
The broker is basically the controller for the portal server. Portlets and the push server can push events to the broker to handle. It can then orchestrate front-end and back-end logic. This will be explored further in another lesson.
Summary
You should now have a good understanding of how portlets are arranged into navigators, banners, pages, tabs, drawers, workspaces, and portal applications to create the applications structure. Moving forward, we will explore how to create different types of portlets (MDA, AFL, AFL-React, and remote types).
At this point, your source XML should look like the following:
String files
The strings entered throughout this lesson were added, by default, to the idsa.training.en.strings file. The strings dialog uses rules about the structure of a string name to place it in the appropriate file. Because all of our strings start with idsa.training, they get placed in an idsa.training.en.strings file. This file can be found in the Resources/Strings section of the navigator.
If you need to do translations to other languages, you would create a new file for each language. For example, if you were doing translation to French, you would create a file called idsa.training.fr.string and place the appropriate French values in that file.