
Activity plan templates
An activity plan is a predefined sequence of activities that can be created for a client, rather than creating each of the activities individually.
Two types of activity plans are available. Choose the one that reflects how you want the activity plan steps to relate to one another:
- An activity plan consists on a number of ordered steps, where each step's creation depends on the creation or completion of the previous step.
- A targeted activity plan consists of one target activity step and multiple other steps, which are all created relative to the target activity, not to each other.
Before you can create an activity plan for a client, you need to create an activity plan template. Each template has steps, which could be tasks, schedule items, documents, or other activity plans. After a template is created, you can add an activity plan based on the template to an individual entity on the Contacts workspace. This creates the activities for the entity and assigns them appropriately to team members.
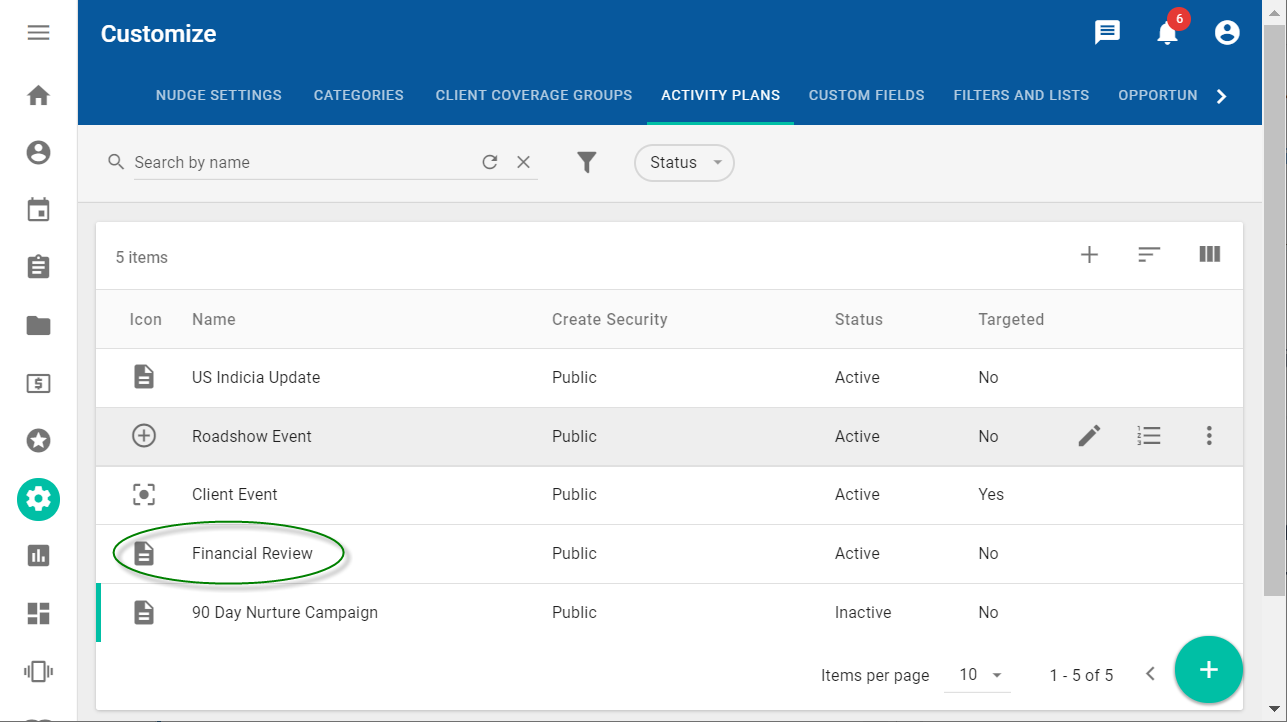
For example, to add a financial review activity plan to a contact, you must already have a financial review activity plan template with defined steps. You can create activity plan templates using the Activity Plans tab on the Customize workspace ![]() .
.
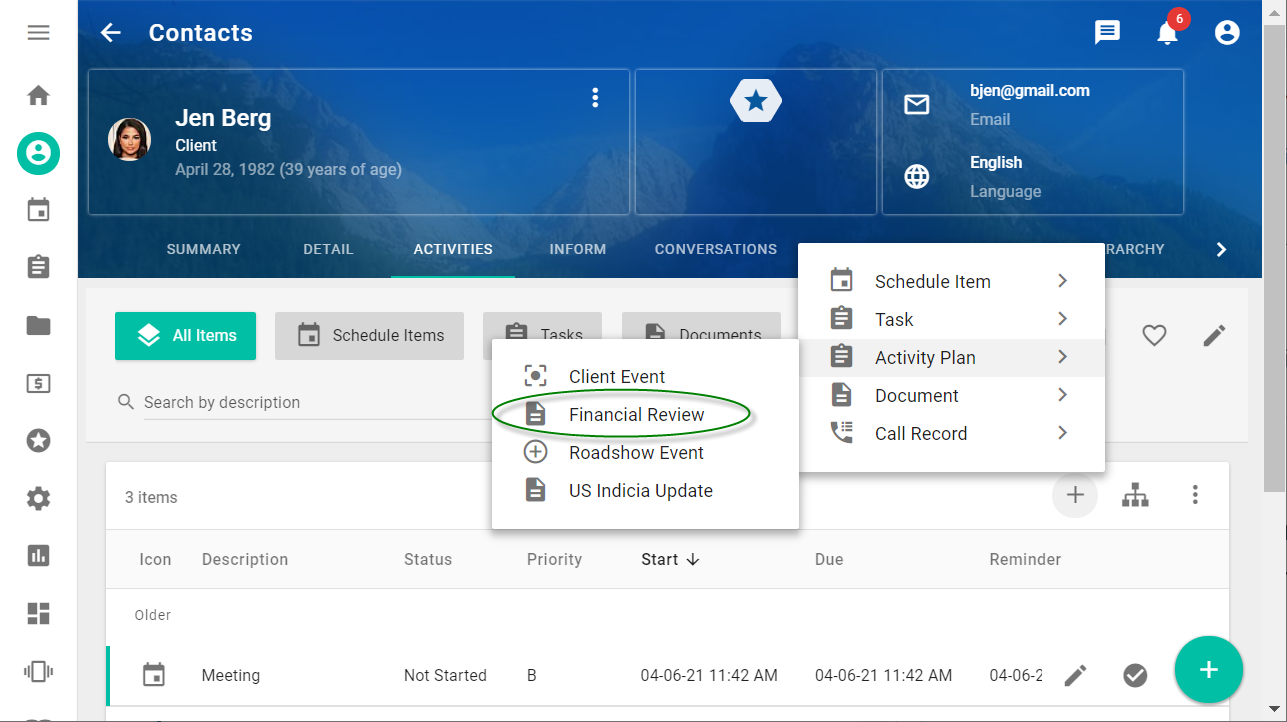
When you add a financial review activity plan to an individual contact, on the Activities tab of the contact's profile in the Contacts workspace ![]() , the defined steps from the template are applied to that contact and are assigned to the users responsible for completing them.
, the defined steps from the template are applied to that contact and are assigned to the users responsible for completing them.
While you are adding the activity plan to an individual contact, you can also modify certain default settings that were included in the template (for example, dates and times) and include additional steps just for that contact.
FAQs
This FAQ contains questions and answers about activity plans and activity plan templates.
Configuring activity plan templates
Activity plan templates define the standard series of steps used when you create an activity plan for a contact.
You can manage activity plan templates using the Activity Plans tab on the Customize workspace of NexJ CRM. The Activity Plans tab displays the list of the existing activity plan templates. You can edit, duplicate, or delete existing templates, or create a new template.
Creating activity plan templates
To create a new activity plan template, select the Activity Plans tab, click the Add button ![]() on top of the data table, select Activity Plan Template or Targeted Activity Plan Template, and provide the required information.
on top of the data table, select Activity Plan Template or Targeted Activity Plan Template, and provide the required information.
The New Activity Plan Template dialog or New Targeted Activity Plan Template dialog allows you to specify the details, steps, attachments, and statuses of an activity plan template. It includes the following tabs and fields:
| Tab | Field name | Description | Required field? |
|---|---|---|---|
| Detail | Name | The name that displays for activities created using the template. | Yes |
| Create Security | The users who can create activity plans from the template. You can select Public or an individual user. | Yes | |
| Icon | The icon that represents your activity plan template. | Yes | |
| Active | When selected, enables a user to create an activity plan based on this template for a client. | Yes | |
| Hide template from filters | When selected, this setting ensures that the template name is not displayed in filters. For example, in the contact's profile in the Activities tab, will not have this template name listed. This is recommended for inactive templates. | No | |
| Description | The description of the template, which displays to users when they view it on the Customize workspace in the Activity Plans tab. | No | |
| Notes | Information related to the activity plan, which displays to users by default when they view the activity plan for a specific client. Users can edit this default description when they create or modify an activity plan. | No | |
| Reference Name | The reference name for the template. This field is automatically generated and cannot be edited. | Not applicable | |
| Default View Security | Specifies who can view the activity plan after a user creates it for a client. This option specifies the default setting. To allow users to change the view security, select Enable editing the security settings for instances of this template. | Yes | |
| Default Edit Security | Specifies who can edit the activity plan after a user creates it for a client. This option specifies the default setting. To allow users to change the edit security, select Enable editing the security settings for instances of this template. | Yes | |
| Enable editing the security settings for instances of this template | Sets the ability of users to edit the security settings for activity plans in NexJ CRM. If set to true (the default value) then a user will be able to edit the security settings when they create a new activity plan based on this template. | No | |
| Steps | In this tab you can add, edit, remove, and reorder the steps of your activity plan template. For more information on activity plan steps, see Configuring activity plan template steps or Configuring targeted activity plan template steps | ||
| Attachments | In this tab, you can add documents from the Document Manager to the selected activity plan template or remove any documents that are attached to the template. If a document from Document Manager has a file associated with it as an attachment, such as a Microsoft Word or PDF file, then this file is personalized and attached to the activity plan when it is created for a specific contact. If the document from Document Manager does not have any attached files, then the document is not reflected in the activity plan instance. If the file attached to the document contains any merge fields, they will be populated with the correct personalized information when the activity plan based on this template is created for a client. A merge field is an object that references a specific piece of information, such as a contact's first name. It is used in Microsoft Word and NexJ CRM to personalize documents and emails for several entities at once. | ||
| Statuses | In this tab, you can specify the default status of any activity plan created from this template and any other statuses that should be available when the activity plan is created for a client.
|
Configuring activity plan template steps
An activity plan template step is stage in an activity plan process. A step can contain a task, a document, or another activity plan. The order of the activities generated from this template is dictated by the order of the steps and how each step is managed.
On the New Activity Plan Template dialog, use the Steps tab to add, delete, modify, or re-order steps.
On the Edit Activity Plan Template dialog, use the Steps tab to modify existing steps. To add, delete, modify, or re-order steps for an existing activity plan template, use the Edit Activity Plan Steps dialog instead.
- To include a new step in the activity plan template, click the Add button in the Steps tab or in the Edit Activity Plan Steps dialog.
- To modify an existing step, click the Edit button in the Steps tab or the Edit Activity Plan Steps dialog.
- To remove an existing step, click the Delete button in the Steps tab or the Edit Activity Plan Steps dialog.
- To re-order steps, click the More Actions button and select Move Up or Move Down in the Steps tab or in the Edit Activity Plan Steps dialog,
The New Activity Plan Step or Edit Activity Plan Step dialog contains the following fields:
| Field name | Description | Required field? |
|---|---|---|
| Template | This field is not editable. It reflects the choice you made when you originally opened the New Step dialog for this step. For tasks and documents, it indicates the type of task or document. For example, To Do or Note. For activity plans, it indicates the name of the activity plan. | Not applicable |
| Description | The name of the activity displayed to users when they add the activity plan to a client. | Yes |
| Status | The initial status for the task, document, or activity plan created from this step. The supported values reflect that statuses available for that activity. For example, a document might have fewer supported statuses than a task. | Yes |
| Priority | The priority level for the activity, which indicates the activity's importance. | No |
| Create Date | Specify the specific offset time the activity plan step will be created. Activity plan steps can be created relative to either the create date of the previous step or the complete date of the previous step. For the first step in a template, the create date is specified relative to the start date of the plan. | Yes |
| ...after | For the first step in the activity plan template, this field is unavailable. This step is created relative to the start date of the plan. | Yes |
| Due Date | Specify the date the step should be completed. The due date is set relative to the create date of the step. | No |
| Notes | Additional information related to the step, which displays to users in the Notes field of the activity generated from the step. | No |
| User assigned to the plan | Select this field to assign the step to the same user to whom the entire activity plan is assigned. This is the default value if the specific coverage role, user or work queue is unavailable when creating an instance of a template. The Assign Action Item section is available when adding a task step or an activity plan step. Select one of the three fields in this section to specify the user to whom the step will be assigned. When a task from this step is created, it appears in the assigned user's Tasks workspace and My Tasks card on the Home workspace. | Yes, for one of these three values |
| Coverage role | Select this field to assign the step based on an assignment model that automatically allocates the step to a user. Choosing this option activates the two fields where you can select an assignment model and a desired coverage role. An assignment model is a method used to assign roles or activities to users automatically in a variety of situations, including campaigns and activity plans. Assignment models are created in NexJ Admin Console on the Assignment Models page. When assignment models that can be applied to action items are created, their Assignment Target field is set to Action Item Assignment. NexJ Admin Console comes with one preset assignment model for action items: Client Coverage. This assignment model assigns steps based on an activity plan's For Contact entity's coverage. For example, if you create the activity plan with a contact named John Doe in its For Contact field, then this assignment model will look at the users assigned to John Doe's coverage. If there is a user on John Doe's coverage team with the same coverage role as the one that you selected, then that user will be assigned this step. Otherwise, the step will be assigned to the user that the activity plan is assigned to. The Assign Action Item section is available when adding a task step or an activity plan step. Select one of the three fields in this section to specify the user to whom the step will be assigned. When a task from this step is created, it appears in the assigned user's Tasks workspace and My Tasks card on the Home workspace. | |
| Specific user | Select this field to assign the step to a specific user that you designate. Choosing this option activates the field where you can select the user. The Assign Action Item section is available when adding a task step or an activity plan step. Select one of the three fields in this section to specify the user to whom the step will be assigned. When a task from this step is created, it appears in the assigned user's Tasks workspace and My Tasks card on the Home workspace. | |
Entity in the plan | Select this field to associate the step with the same client with whom the entire activity plan is associated. This is the default value if the specific related entity or role is unavailable when creating an activity plan from this template for a client. Select one of the three fields in the For Contact section to indicate which client should be associated with this step. When the step is created, it appears in the client's profile on the Activities tab. | Yes, for one of these three values |
Related entity | Select this field to associate this step to any entity that holds a specified relationship to the contact that is associated with the activity plan. Choosing this option activates the field where you can select that relationship from the list of relationship custom fields. Select one of the three fields in the For Contact section to indicate which client should be associated with this step. When the step is created, it appears in the client's profile on the Activities tab. | |
| Role | Select this field to associate this step to any entity that holds a specified role in relation to the specified hierarchy. Choosing this option activates the fields where you can select the hierarchy context and the desired role. Select one of the three fields in the For Contact section to indicate which client should be associated with this step. When the step is created, it appears in the client's profile on the Activities tab. | |
| Document Manager Items | Add documents from the Document Manager to the selected activity plan step or remove any documents that are attached to the step. If the document from Document Manager has an attached file, such as a Microsoft Word or PDF file, then this file is personalized and attached to the step when the activity plan is created for a specific contact. If the document from Document Manager does not have any files associated with it, then the document is not reflected in the steps for the activity plan instance. If the file attached to the document contains any merge fields, they will be populated with the correct personalized information when the activity plan based on this template is created for a client. A merge field is an object that references a specific piece of information, such as a contact's first name. It is used in Microsoft Word and NexJ CRM to personalize documents and emails for several entities at once. | No |
Configuring targeted activity plan template steps
An activity plan template step is stage in an activity plan process. Each activity plan has one target activity, which is the step that all other activities are scheduled relative to. A target activity can be a task or a schedule item. All other steps can be tasks, documents, or other activity plans. The activities generated from this template are created after the activity plan is created for the contact, based on how the steps were defined relative to the target activity.
On the New Activity Plan Template dialog, use the Steps tab to add, delete, modify, or re-order steps.
On the Edit Activity Plan Template dialog, use the Steps tab to modify existing steps. To add, delete, modify, or re-order steps for an existing activity plan template, use the Edit Activity Plan Steps dialog instead.
You cannot change a target activity into a non-target step.
After you add one or more steps relative to the target activity, you can no longer delete the target activity step.
- To include a new step in the activity plan template, click the Add button in the Steps tab or in the Edit Activity Plan Steps dialog.
- If a target activity step has not been created yet, select Add Target Activity and specify the activity type. You must add a target activity before adding any other steps.
- If a target activity step has already been created, select Add Step and specify the activity type.
- To modify an existing step, click the Edit button in the Steps tab or the Edit Activity Plan Steps dialog.
- To remove an existing step, click the Delete button in the Steps tab or the Edit Activity Plan Steps dialog.
- To re-order steps, click the More Actions button and select Move Up or Move Down in the Steps tab or in the Edit Activity Plan Steps dialog. Re-ordering steps in a targeted activity plan does not affect when activities are created or scheduled.
The New Activity Plan Step or Edit Activity Plan Step dialog contains the following fields:
| Field name | Description | Required field? |
|---|---|---|
| Template | This field is not editable. It reflects the choice you made when you originally opened the New Step dialog for this step. For tasks, documents, and schedule items, it indicates the type of activity. For example, To Do or Note. For activity plans, it indicates the name of the activity plan. | Not applicable |
| Description | The name of the activity displayed to users when they add the activity plan to a client. | Yes |
| Status | The initial status for the activity or activity plan created from this step. The supported values reflect that statuses available for that activity. For example, a document might have fewer supported statuses than a task. | Yes |
| Priority | The priority level for the activity, which indicates the activity's importance. | No |
| Step Schedule | For target activities only. Specify whether the target activity step should start relative to the plan start or on a specific date.
| Yes |
| Create Date | For steps which are not target activities only. Specify when the activity should be created. You need to specify the length of the offset in days, whether it is relative to the start or the end of the target activity, and whether it should occur before or after the target activity. | Yes |
| Due Date | For steps which are not target activities only. Specify when the activity should end. You need to specify how long after the activity is created it is expected to end. If a due date isn't specified for a step, the end date will be the same as the create date. | No |
| Notes | Additional information related to the step, which displays to users in the Notes field of the activity generated from the step. | No |
| User assigned to the plan | Select this field to assign the step to the same user to whom the entire activity plan is assigned. This is the default value if the specific coverage role, user or work queue is unavailable when creating an instance of a template. The Assign Action Item section is available when adding a task step or an activity plan step. Select one of the three fields in this section to specify the user to whom the step will be assigned. When a task from this step is created, it appears in the assigned user's Tasks workspace and My Tasks card on the Home workspace. | Yes, for one of these three values |
| Coverage role | Select this field to assign the step based on an assignment model that automatically allocates the step to a user. Choosing this option activates the two fields where you can select an assignment model and a desired coverage role. An assignment model is a method used to assign roles or activities to users automatically in a variety of situations, including campaigns and activity plans. Assignment models are created in NexJ Admin Console on the Assignment Models page. When assignment models that can be applied to action items are created, their Assignment Target field is set to Action Item Assignment. NexJ Admin Console comes with one preset assignment model for action items: Client Coverage. This assignment model assigns steps based on an activity plan's For Contact entity's coverage. For example, if you create the activity plan with a contact named John Doe in its For Contact field, then this assignment model will look at the users assigned to John Doe's coverage. If there is a user on John Doe's coverage team with the same coverage role as the one that you selected, then that user will be assigned this step. Otherwise, the step will be assigned to the user that the activity plan is assigned to. The Assign Action Item section is available when adding a task step or an activity plan step. Select one of the three fields in this section to specify the user to whom the step will be assigned. When a task from this step is created, it appears in the assigned user's Tasks workspace and My Tasks card on the Home workspace. | |
| Specific user | Select this field to assign the step to a specific user that you designate. Choosing this option activates the field where you can select the user. The Assign Action Item section is available when adding a task step or an activity plan step. Select one of the three fields in this section to specify the user to whom the step will be assigned. When a task from this step is created, it appears in the assigned user's Tasks workspace and My Tasks card on the Home workspace. | |
Entity in the plan | Select this field to associate the step with the same client with whom the entire activity plan is associated. This is the default value if the specific related entity or role is unavailable when creating an activity plan from this template for a client. Select one of the three fields in the For Contact section to indicate which client should be associated with this step. When the step is created, it appears in the client's profile on the Activities tab. | Yes, for one of these three values |
Related entity | Select this field to associate this step to any entity that holds a specified relationship to the contact that is associated with the activity plan. Choosing this option activates the field where you can select that relationship from the list of relationship custom fields. Select one of the three fields in the For Contact section to indicate which client should be associated with this step. When the step is created, it appears in the client's profile on the Activities tab. | |
| Role | Select this field to associate this step to any entity that holds a specified role in relation to the specified hierarchy. Choosing this option activates the fields where you can select the hierarchy context and the desired role. Select one of the three fields in the For Contact section to indicate which client should be associated with this step. When the step is created, it appears in the client's profile on the Activities tab. | |
| Document Manager Items | Add documents from the Document Manager to the selected activity plan step or remove any documents that are attached to the step. If the document from Document Manager has an attached file, such as a Microsoft Word or PDF file, then this file is personalized and attached to the step when the activity plan is created for a specific contact. If the document from Document Manager does not have any files associated with it, then the document is not reflected in the steps for the activity plan instance. If the file attached to the document contains any merge fields, they will be populated with the correct personalized information when the activity plan based on this template is created for a client. A merge field is an object that references a specific piece of information, such as a contact's first name. It is used in Microsoft Word and NexJ CRM to personalize documents and emails for several entities at once. | No |
Modifying activity plan templates
You can make changes to any activity plan template. If an activity plan has already been created from this template, any changes that you make will only apply to newly created plans using your modified template. Any plans that were created using the pre-modified template will remain the same.
You can make changes to your activity plan template details from the Edit Activity Plan Template dialog. To open the Edit Activity Plan Template dialog, select the Activity Plans tab and click the Edit button ![]() on the data table row with the template you want to modify.
on the data table row with the template you want to modify.
You cannot add, delete, or re-order steps using the Edit Activity Plan Template dialog. You can only modify step details for existing steps using this dialog.
To add, delete, or re-order steps for an existing activity plan, you must use the Edit Activity Plan Steps dialog instead.
Managing activity template steps
To add, delete, or re-order steps for an existing activity plan, click the Edit Steps button ![]() for the template that you want to update. In the Edit Activity Plan Steps dialog that appears, modify the steps as required.
for the template that you want to update. In the Edit Activity Plan Steps dialog that appears, modify the steps as required.
Copying activity plan templates
If you want to create an activity plan template that is similar to an existing template, you can save time by making a copy of the existing activity plan template. Click the Add Copy button ![]() for the template that you want to copy. In the New Activity Plan Template dialog that appears, modify any required details.
for the template that you want to copy. In the New Activity Plan Template dialog that appears, modify any required details.
Disabling and deleting activity plan templates
You can delete or disable activity plan templates in the Activity Plans tab.
You can delete any activity plan template that has not yet been used. Click the Delete button ![]() for the template that you want to delete. After it has been deleted, the template is no longer displayed to users on the Contacts workspace.
for the template that you want to delete. After it has been deleted, the template is no longer displayed to users on the Contacts workspace.
If the template has already been used, you will be unable to delete it. Instead, you can deactivate the template. Click the Edit button for the template and clear the Active checkbox in the Edit Activity Plan Template dialog.