
Adding notes
Notes enable you to track information about other activities for an entity, and to make it accessible to the whole coverage team, specific users, or only to yourself. For example, after a phone call with a client you can add a note to the entity record to update the coverage team on the key discussion points and outcomes. If needed, you can restrict the note view security to specific members of the coverage team and edit security only to yourself.
Use the Notes card to enter and save new notes or browse existing notes about an entity. The Notes card displays its contents in reverse chronological order, with the most recent note at the top. To create a new note, enter text in the Type new note here field and click the Save button 


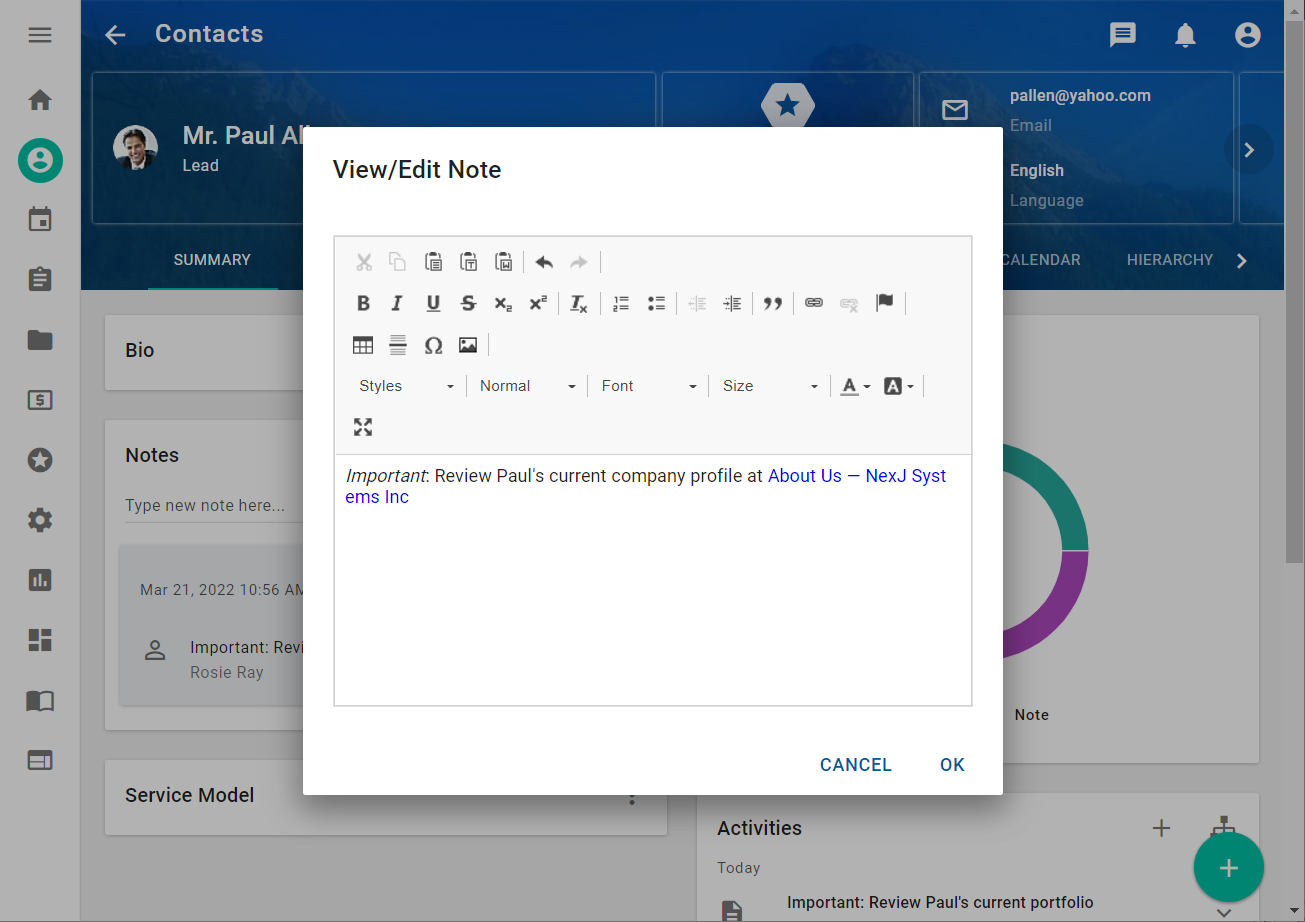
Notes on the Notes card are always created and displayed in plan text without additional styling or formatting. However, if rich text formatting is enabled in your deployment, you can click the View/Edit button to add rich text formatting to the text.
If rich text formatting is enabled, a toolbar is displayed on the top of the text field. You can use the toolbar at the top of the field to include styles such as bolding, italics, bulleted or numbered lists, tables, and hyperlinks. You can also click the Image button in the toolbar and upload images from your computer. The images cannot exceed 2MB in size and must be in JPG, JPEG, or PNG format. To specify additional image settings, such as image size or alignment, navigate to the Advanced tab in the Image dialog.
When you are editing notes text in the rich text editor, you can access the native menu in the text body field by pressing CTRL+right-click, and you can select your spell-check settings. You can also press CTRL+right-click on misspelled words and select from the list of suggested corrections. To undo all spell-check corrections at one time, press the CTRL key while selecting all corrections, and when finished click the Undo toolbar button. Spell-check corrections will all be saved as one undo state until the CTRL key is released. If separate states are desired because you want to undo corrections separately, release the CTRL key in between corrections. In Microsoft Internet Explorer, spell-check corrections are not detected by the undo or redo unless there are prior text modifications.
When you are using Microsoft Edge or Google Chrome, NexJ recommends that you enable the Basic spell checking assistance setting. You can find these settings in the Languages settings under "Use writing assistance" in Microsoft Edge or "Spell check" in Google Chrome.
NexJ cannot control where the browser sends text, and is not responsible for this action. The same action applies for any mobile phone applications that may be monitoring the clipboard, keyboard, or text.
You can copy text and paste it into a Notes field. When your cursor is in a Notes field, you can press Ctrl+V to paste copied text from your clipboard into the Notes field or right-click in the Notes field and select Paste.
If rich text formatting is enabled, when you copy and paste formatted text, it retains the formatting.
Every note in NexJ CRM is considered an activity of the type document. As a result, you can also view and create notes for a contact in the Activities tab, by selecting a document template called Note.
When viewing a list of activities in a data table, you can see the full note as a new row, below the row with all other information about the activity. To include the notes rows in the data table, use the Select columns command (which may be accessed from the More Actions menu for the data table) to select the Note column.
If rich text formatting is enabled, notes in the Activities tab always include rich text when they are created or edited. However, the Notes row in the data table only displays the note in plain text.
After rich text formatting is enabled for the application, all existing notes are automatically converted to rich text.
When editing note details from the More Actions menu, you can change the view and edit security for the note in the Security tab of the Edit dialog. By default, both the view and edit security for notes are set to Public. For more information about security settings, see Security settings for objects in NexJ CRM.
Entity security settings impact note security in the following ways:
- When the entity view security is set to Private, the entity and the associated note are only visible to the user who has view security. As a result, only that user can view or edit the note.
- Entity edit security does not impact note edit security. When the entity view security is set to Public and edit security is set to Private, the note is visible to all users and all users can edit or delete the note.
The Security tab is not available when the Hierarchical Access Model is enabled.