For an initial deployment of the NexJ Bridge Adapter on an existing NexJ CRM instance, you must create thebrgadapter:BRGadapterdata source by running the recreate command in the Data Load Tool in NexJ Studio. For subsequent deployments of the Bridge Adapter, generating and running the upgrade script may be required.
Reseed the object queue database for NexJ CRM when installing the Data Bridge Adapter. Use the following SQL step:
SQL
Update OQVersion set loaded=0
By default, triggering a reseed of the NexJ CRM database, adds the brgadmin user name (Data Bridge specific user) to the model. If necessary another user name can be used and it requires the brdadapter:gBridgeUser privilege, which enables a Data Bridge user to communicate with NexJ CRM.
Configuring your Data Bridge server
The following information describes how to configure your Data Bridge server.
Setting up Data Bridge with basic authentication
Data Bridge should be initially configured with basic authentication. After your initial deployment, you can change your authentication configuration. For example, the Data Bridge UI supports OAuth 2.0 authentication.
The following are required to set up Data Bridge:
Data Bridge build package
Database setup script as generated through NexJ Studio
ssl.keystore file
Supported JDK as specified in the NexJ Data Bridge Release Notes for your release
In NexJ Studio, select Run > Run tool > Database Schema Tool to set up the brg:DefaultRelational database.
Under Options and in the Command field, select setup - generate and SQL script for setting up the database.
To run the generated scripts against your database server, click Run.
Configuring the Data Bridge environment file
In NexJ Studio, in the Deployment layer'sEnvironmenttab, open your environment file for the current Data Bridge deployment.
Set thedng.enabledflag to true.
(Optional) To enable Data Bridge to access NexJ CRM model attributes that are not persisted in a database, and display them in theAdvancedtab in the Add Fields dialog on the Create View page in the Data Bridge client application, set thedng.useNonPersistedAttributesflag to true. This is an advanced use case and should only be done after consulting the NexJ project or support team.
Add the required channel connections, modify the required URL, context root, and the trust certificate for the NexJ CRM server, as shown in the following example code.
The brg:KafkaSender channel is used for publishing Kafka messages.
The dng.useNonPersistedAttributes flag must be set to true in order for the path attribute of the Attachments subject area to be shown in the Add Fields dialog.
The default user name and password values for the brg:CRMSender channel should be set to brgadmin or the values for a NexJ CRM user that has the brdadapter:gBridgeUser privilege. The brg:CRMSender channel holds outgoing RPC requests to the NexJ CRM application. Specify the complete URL of the CRM API endpoint in the brg:CRMSender channel.
When Data Bridge is deployed in a distributed (clustered) application environment, it is necessary to provide a shared filesystem location, such as a NAS disk, that will be accessible to all Data Bridge application server nodes. A shared filesystem directory must be configured for each of the .environment file variables mentioned below:
Environment property
Example directory path
Description
dng.model.location
/nexj/bridge/metaclass
Metaclass Path – This refers to the file path from where the data engine metaclass is being loaded.
dng.sarea.location
/nexj/bridge/sarea
Subject Area Path – This refers to the file path from where the subject areas are being loaded.
dng.sarea.augment.location
/nexj/bridge/augment
Subject Area Augment Path - This refers to the file path from where the subject area augments are being loaded.
bridge.exportDirectory
/nexj/bridge/export
The directory where exported CSV files will be saved to.
Output file parameters
The delimited files that are generated from snapshots that use the File (Delimited) publishing target have the file extension that you have configured for delimited files. Use the following environment file flags to configure the defaults for delimited file format settings, and then you can change these settings using Data Bridge System Admin Console, as described at Using the Global Settings workspace.
Flag
Value
bridge.exportDirectory
The absolute path of the output directory (for example, C:\demo).
bridge.pageSize
For Kafka snapshots and delimited file snapshots this flag governs the request page size when data is retrieved from CRM. When isChunked = #t, each snapshot file chunk will contain an approximately equal number of records.
The allowed range of values is 1 - 4096.
Configuring the Data Bridge properties file
The following example shows properties that are included in a Data Bridge properties file.
You can configure advanced settings relating to functionality of the CRM Data Bridge Adapter and Data Bridge Server in their respective System Admin Consoles.
Configuring the NexJ CRM Data Bridge Adapter
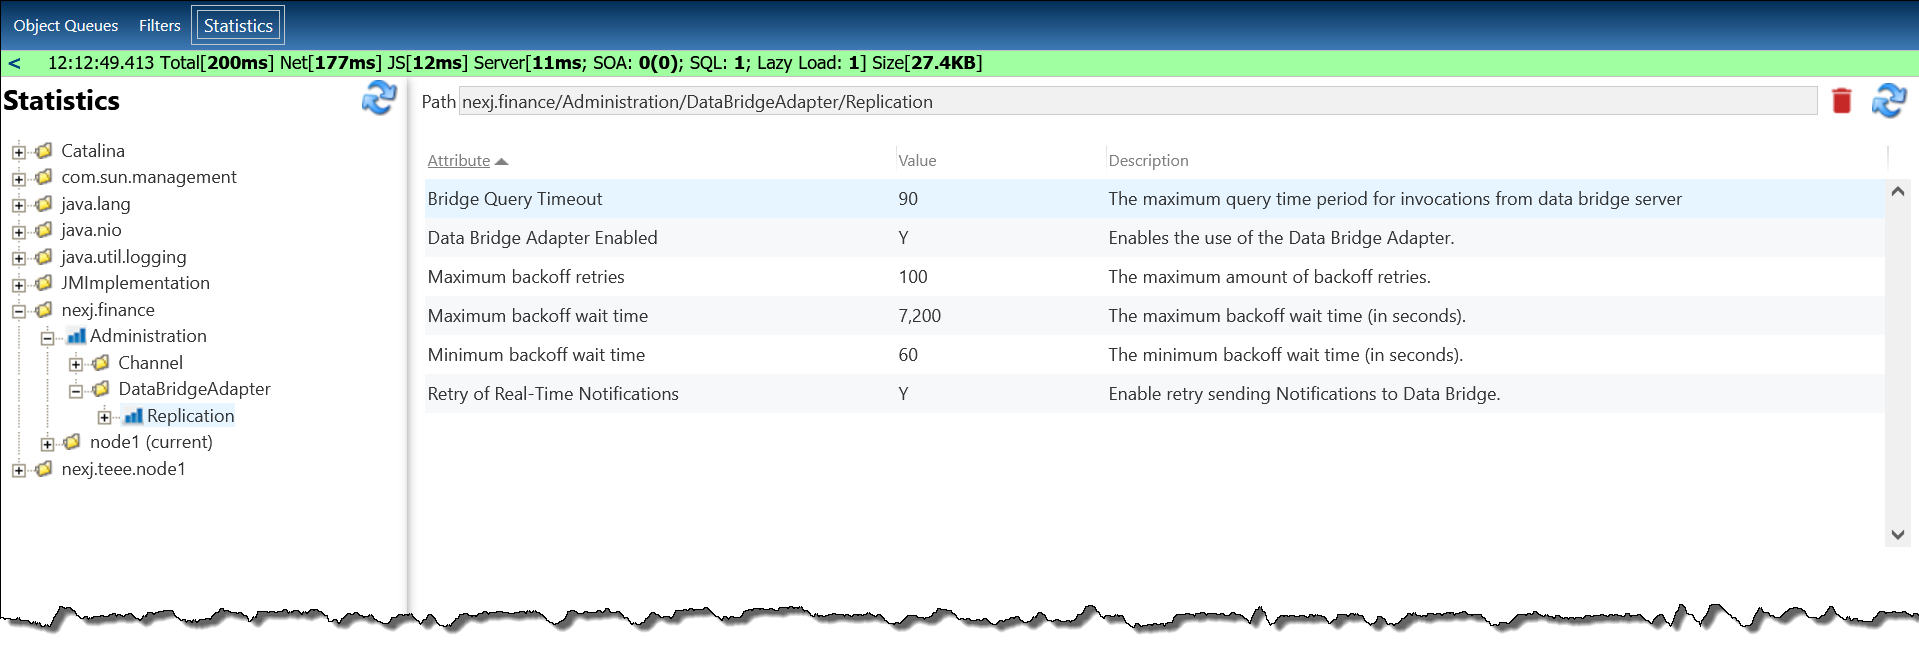
You can configure the Data Bridge Adapter on the Statistics page in NexJ CRM System Admin Console. Navigate to the Statistics page in NexJ CRM System Admin Console, select nexj.finance > Administration > DataBridgeAdapter > Replication, and configure the required settings, which are shown in the following screenshot.
NexJ CRM System Admin Console Statistics page
Data Bridge SQL query timeout
The Bridge Query Timeout parameter is the maximum query time period for invocations from the Data Bridge server, and by default it is set at 90 seconds. You can provide a different value.
The Bridge Query timeout will apply to any SQL queries that Data Bridge executes in NexJ CRM and will effectively overwrite the SQL query timeout configured in CRM for Data Bridge queries only. Any other CRM queries will remain subject to the SQL query timeout (typically 30 seconds) configured in CRM.
Enabling or disabling the Data Bridge Adapter
For information about the Data Bridge Adapter Enabled parameter, see Setting up Data Bridge.
Error handling of failed CRM event notifications from the NexJ CRM Data Bridge Adapter
You can configure the exponential backoff and retry settings for messages that failed to get delivered to Data Bridge.
The NexJ CRM Data Bridge Adapter is responsible for sending notifications of CRM data change events to Data Bridge. If changes fail to synchronize from CRM to Data Bridge due to a transient condition (for example, a network service interruption), they will be queued and retried. The rate at which such failed transactions will be retried is controlled by the "exponential backoff" configuration described below.
To configure the following backoff and retry settings, navigate to the Statistics page in NexJ CRM System Admin Console, select nexj.finance > Administration > DataBridgeAdapter > Replication, and enter a new number in the associated Value field:
By default, the initial wait to retry time is 30 seconds, which will increase by one minute until a maximum 600 second interval is reached. There is a maximum of 10 message failures. This equates to about 1 hour of retries.
Maximum backoff retries (maximum number) - the number of times a notification message retry is attempted
Maximum backoff wait time (in seconds) - the maximum wait time between retries
Minimum backoff wait time (in seconds) - the minimum wait time between retries (the first retry will be this value and subsequent retries will add a minute)
Retry of Real-Time Notifications - enter Y to attempt a retry of notification messages or N to not attempt a retry
Failed CRM event notifications will be queued up and retried on brgadapter:RealTimeStreamingQueue. Permanently failed messages are routed to brgadapter:RealTimeStreamingErrorQueue.
Configuring the Data Bridge Server
You can configure the Data Bridge Server in Data Bridge System Admin Console.
Error handling when retrieving CRM data from Data Bridge
After receiving a change notification from NexJ CRM, Data Bridge will attempt to retrieve the necessary data from CRM. If Data Bridge fails to successfully read data from CRM due to a transient condition (for example, a network service interruption), the changes will be queued and retried. The rate at which such failed transactions will be retried is controlled by the "exponential backoff" configuration described below.
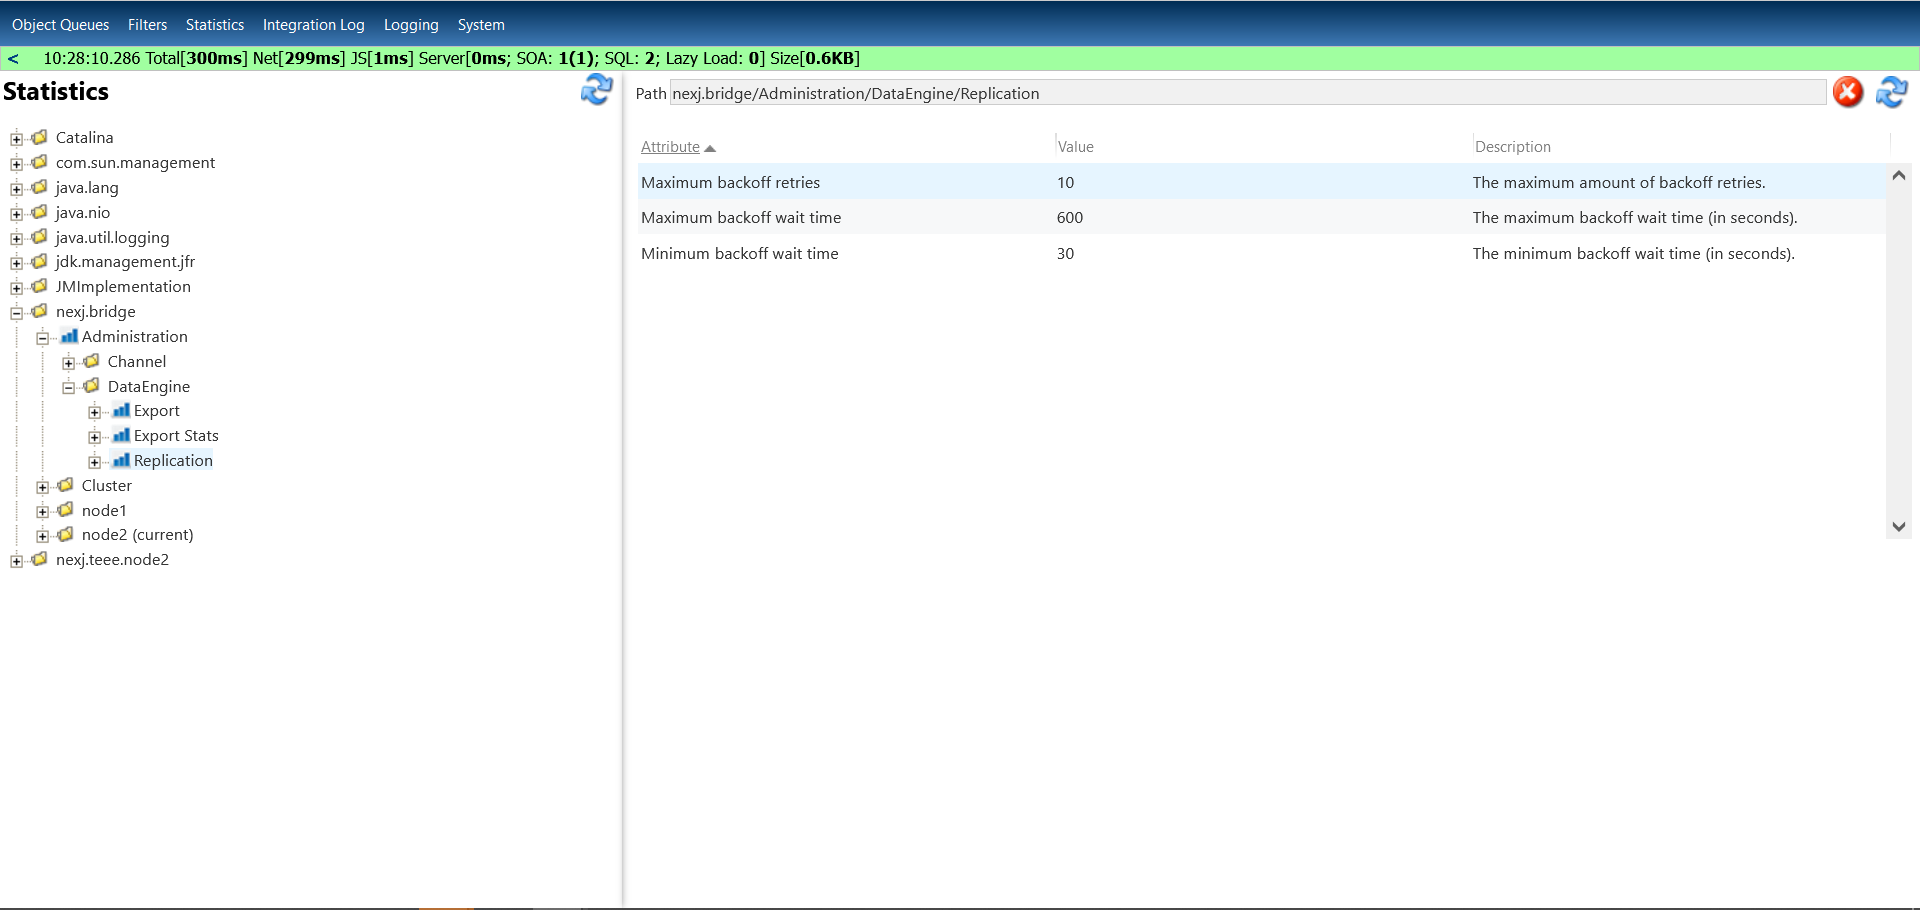
To configure the following backoff and retry settings, navigate to the Statistics page in Data Bridge System Admin Console, select nexj.bridge > Administration > DataEngine > Replication, and enter a new number in the associated Value field:
By default, the initial wait to retry time is 30 seconds, which will increase by one minute until a maximum 600 second interval is reached. There is a maximum of 10 message failures. This equates to about 1 hour of retries.
Maximum backoff retries (maximum number) - the number of times a notification message retry is attempted
Maximum backoff wait time (in seconds) - the maximum wait time between retries
Minimum backoff wait time (in seconds) - the minimum wait time between retries (the first retry will be this value and subsequent retries will add a minute)
Failed transactions will be queued up and retried on brg:ProcessQueue.