NexJ CRM has two ways of managing leads, Classic Leads and Integrated Lead Management. Only one method can be enabled at one time.
In the Classic Leads feature, a lead operates as a separate object that can be linked to a contact. Classic Leads uses a separate workspace for working with leads and has a reduced ability to leverage activity types. When a lead progresses to a prospect or a client, it is converted to a contact. Any lead-specific information in this topic applies only to deployments that include the Classic Leads feature.
In Integrated Lead Management, a lead is an entity similar to a contact, which can be managed through a list within the Contacts workspace. The experience working with a lead is identical to that of working with any other contact. For example, any activity type can be created for a lead. Creating a lead and progressing it to a prospect or client is a seamless process. If your deployment includes the Integrated Lead Management feature, importing leads follows the same process as importing other contacts.
Business administrators can import contacts or leads records into NexJ CRM from a legacy system to a staging area in NexJ CRM using the Import workspace .
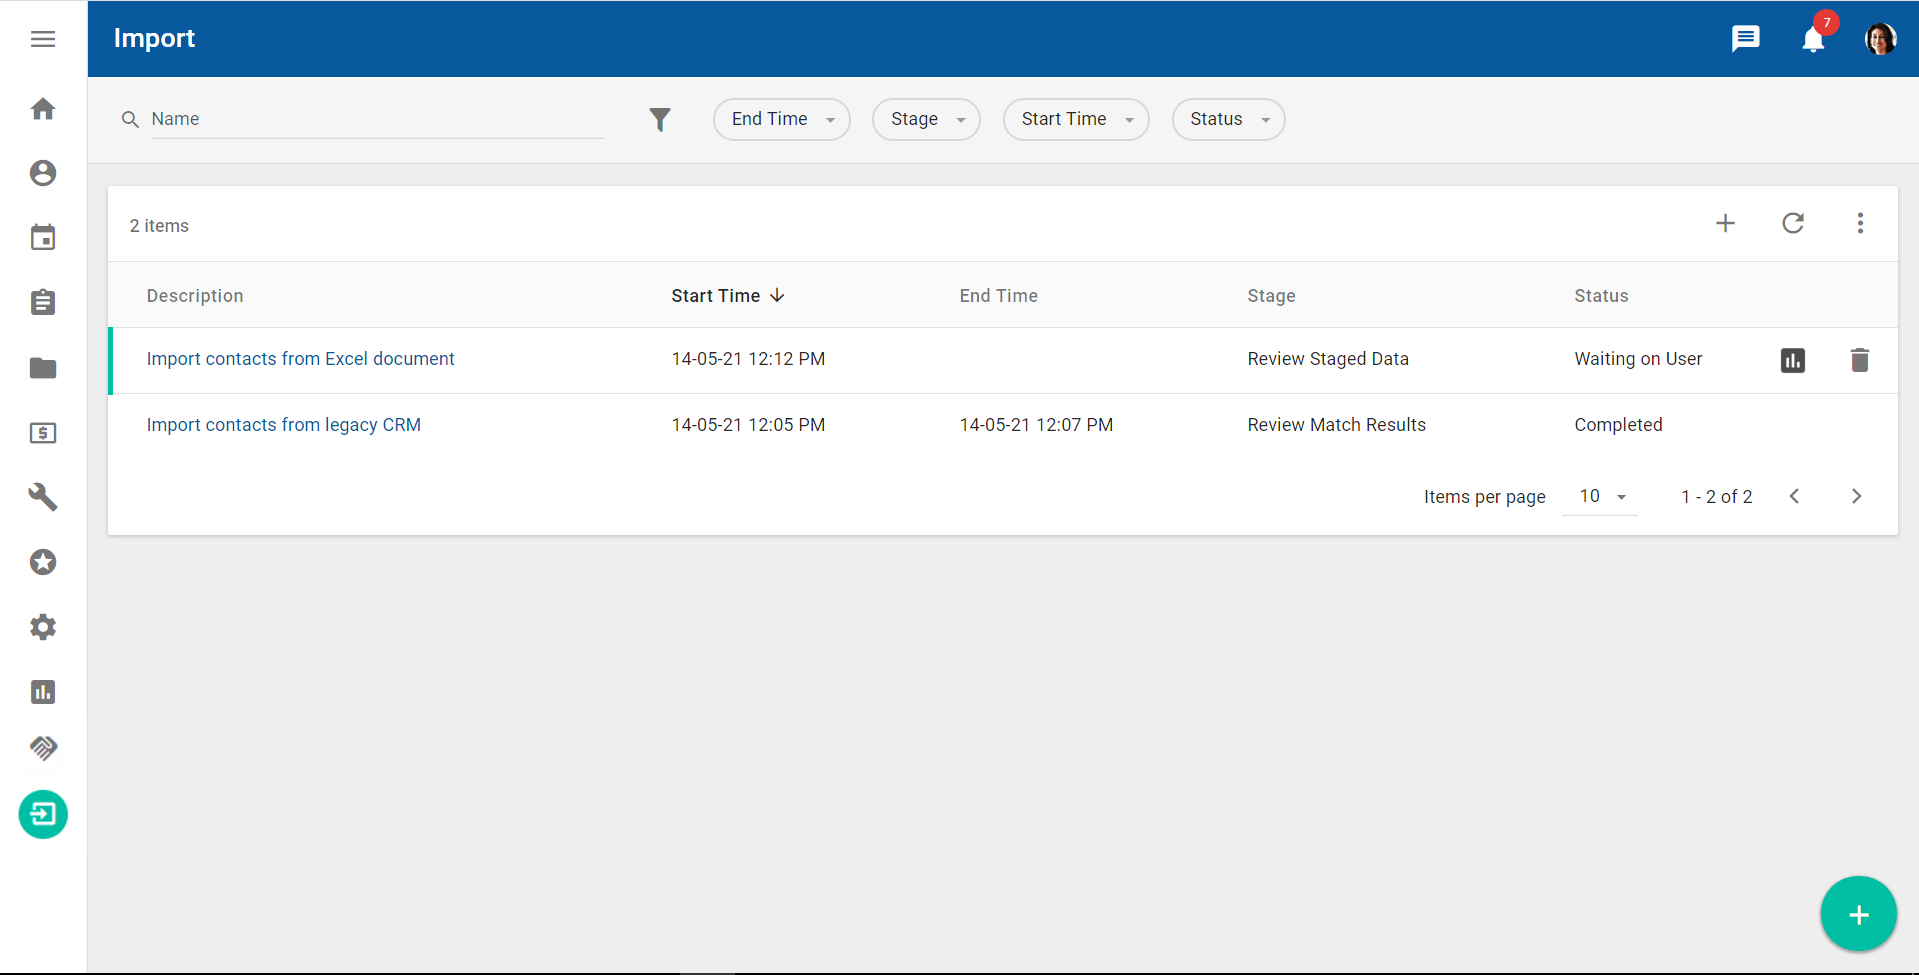
An example of the Import workspace is shown in the following screen capture:
The import process involves the following steps:
Your business administrator creates an import package that contains one or more CSV files, as well as information mapping the data in the files to the correct fields in NexJ CRM. This ZIP file contains the legacy data in comma-separated values (CSV) files and mapping files, which map the legacy data to your current database.For more information, see Importing contacts and Importing leads.
Your business administrator imports the data in the import package to a staging server. For more information, see Importing contacts and Importing leads.
Your business administrator and you can review the imported data. You can edit or delete imported contact records at this stage. For more information, see Reviewing staged data.
Review the suggested matches between the imported data and your existing database records. For more information, see Reviewing match results.
Process the reviewed data to integrate it with the data in your current database. For more information, see Processing reviewed data.
After your business administrator has imported contacts data, review the staged records by navigating to the Import workspace, and clicking on the import job to open the Import detail page, where you will verify that the data is accurate before you merge it with existing system records. During your review, you can remove old or outdated records that you do not want to import into NexJ CRM. Carrying out this review helps ensure a smooth migration of the data into NexJ CRM.
To find your import job in the Import data table on the Import workspace, you can enter the job's name in the search field or use the following filter chips that are provided by NexJ:
End Time - The end date and time for the job.
Import Type - The type of import (contact import or lead import).
Stage - The stage for the job (for example, Import into Staging, or Review Match Results).
Start Time - The start date and time for the job.
Status - The status of your job (for example, Running, Failed, Completed, or Waiting on User).
You can also add additional filter chips. For more information about searching for and filtering records, see Searching and filtering in NexJ CRM.
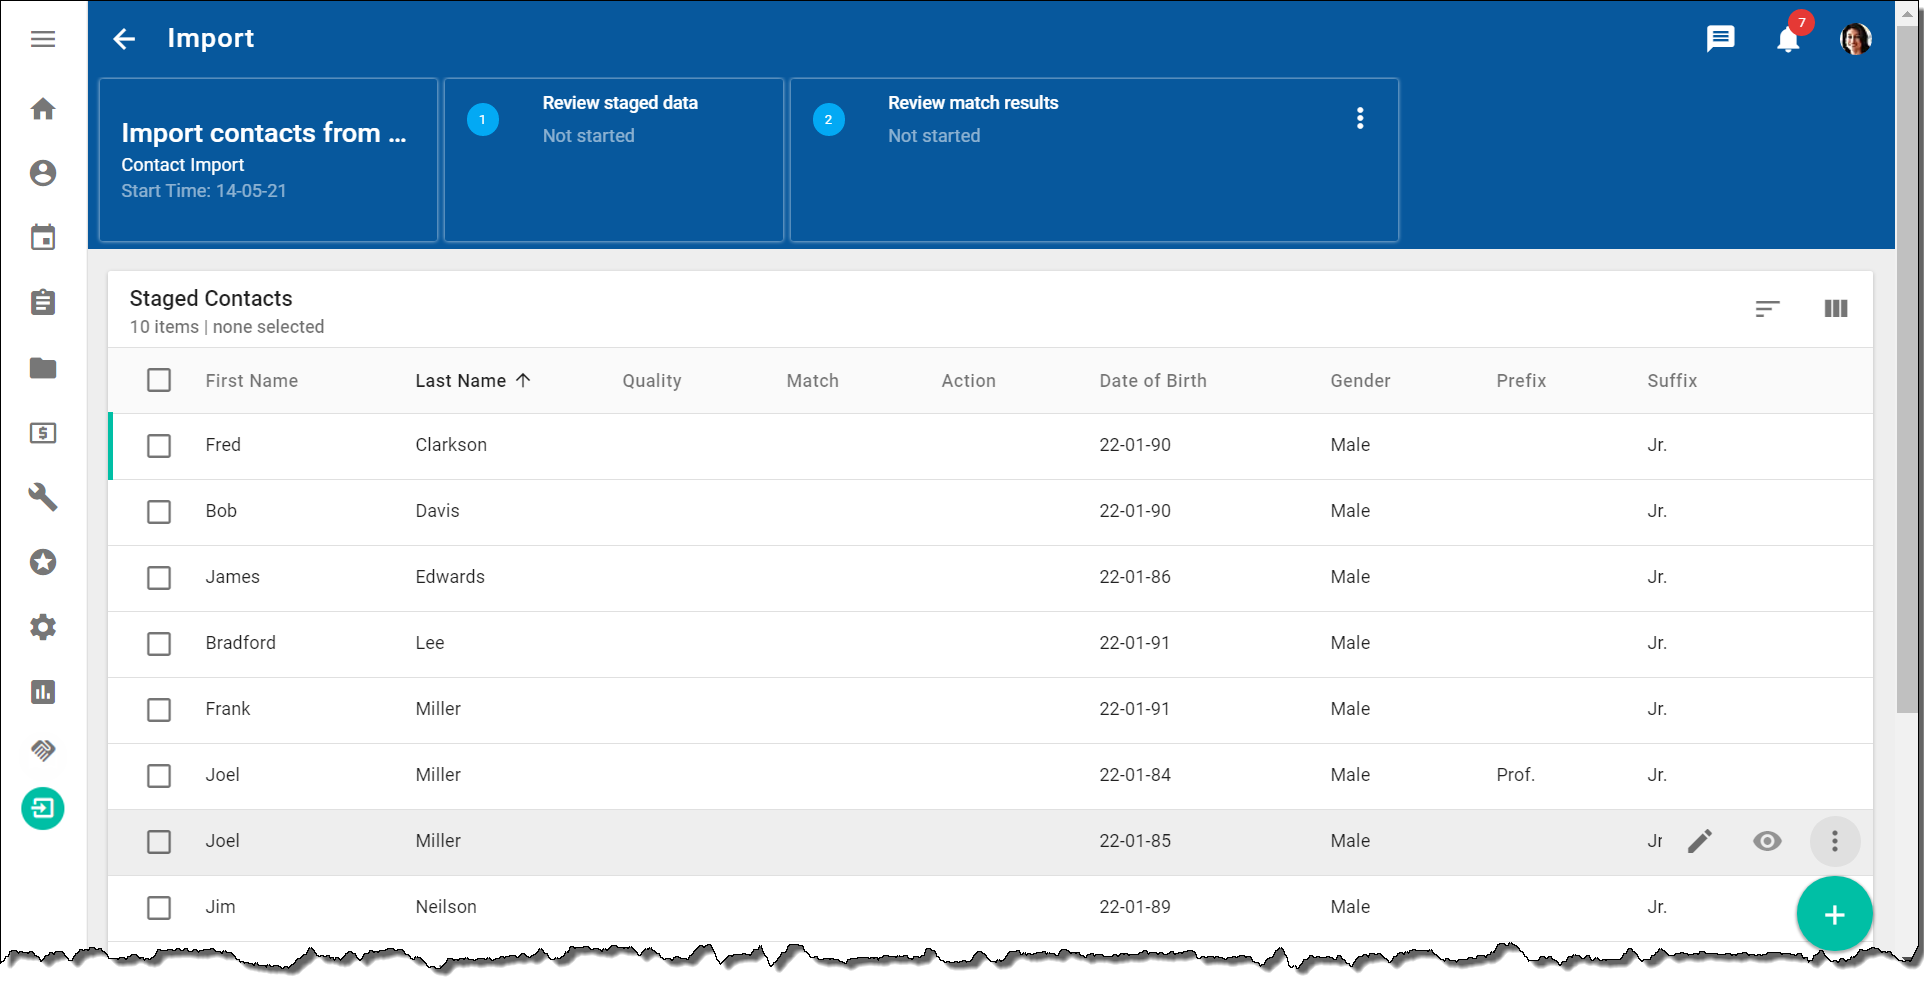
The banner on the Import detail page provides a summary of the import job. You will see that neither the Review staged data stage or Review match results stage have started.
The following screen capture shows an example of a contacts import:
From the Staged Contacts data table, you can:
Review all records that were included with the import package.
Modify a selected record by clicking the Edit button and updating basic biographical information. In the Edit dialog, you can also review but not update addresses, activities, user fields, communications, custom fields, and categories.
Exclude a selected record from any further processing by clicking on the More Actionsbutton and selecting Delete. You can remove all records by selecting all of them and clicking Delete in the data table toolbar.
Note
If you discard a staged record, the action cannot be undone.
You can sort the Staged Contacts or Staged Leads data table by clicking Sort By in the data table toolbar and selecting the column you would like to sort by. For more information, see Sorting data tables by columns. You can also change the columns that display in the data table by clicking Select columns in the data table toolbar and selecting the required columns.
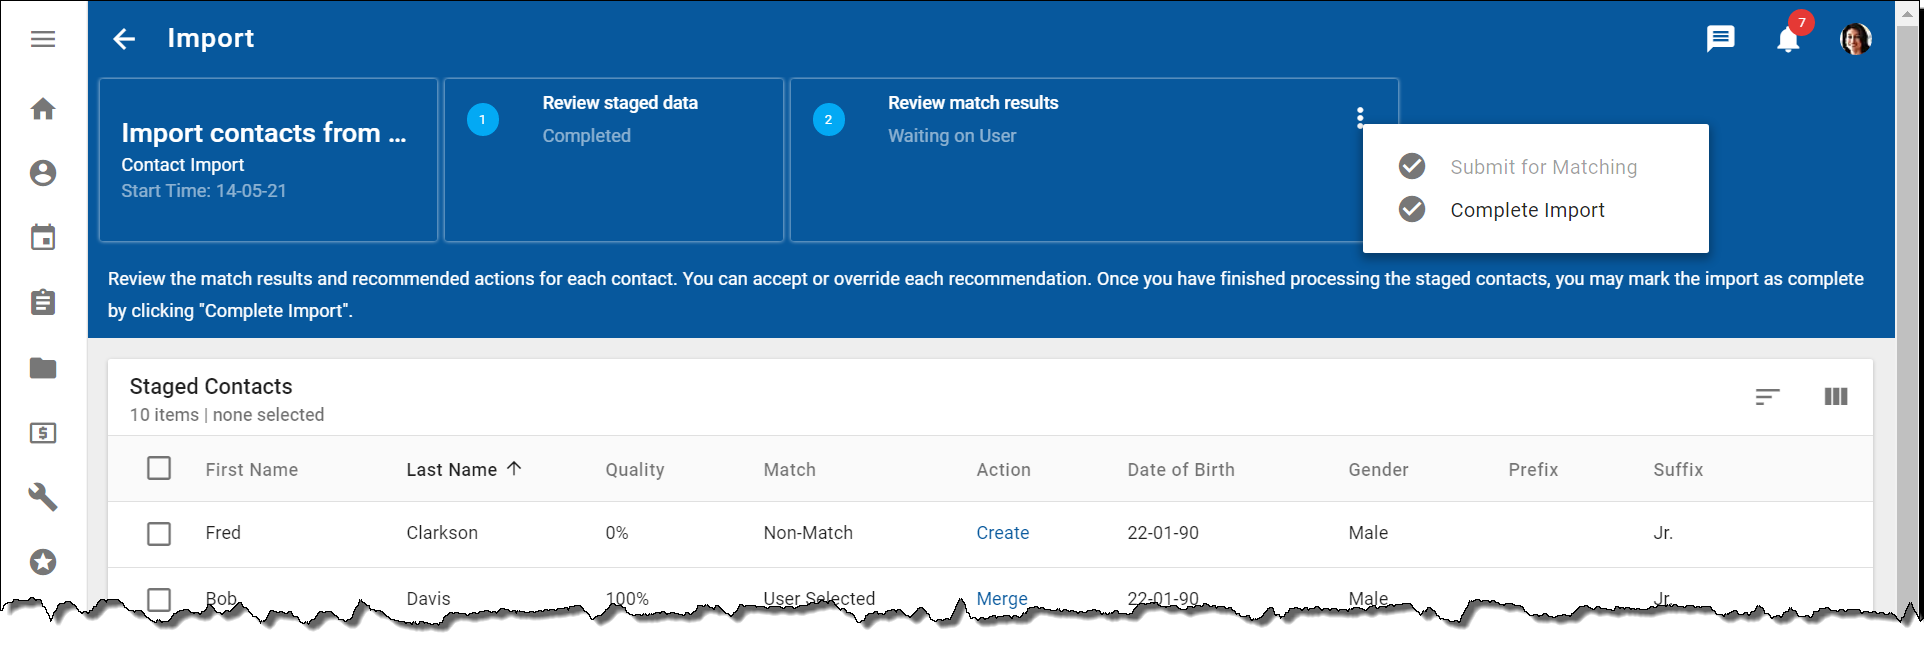
When you are satisfied that the contacts data is correct, submit the data for matching by clicking the More Actions button in the banner, and selecting Submit for Matching.
Note
In order to optimize performance, it is recommended that the size of each submitted batch be limited to 5,000 records.
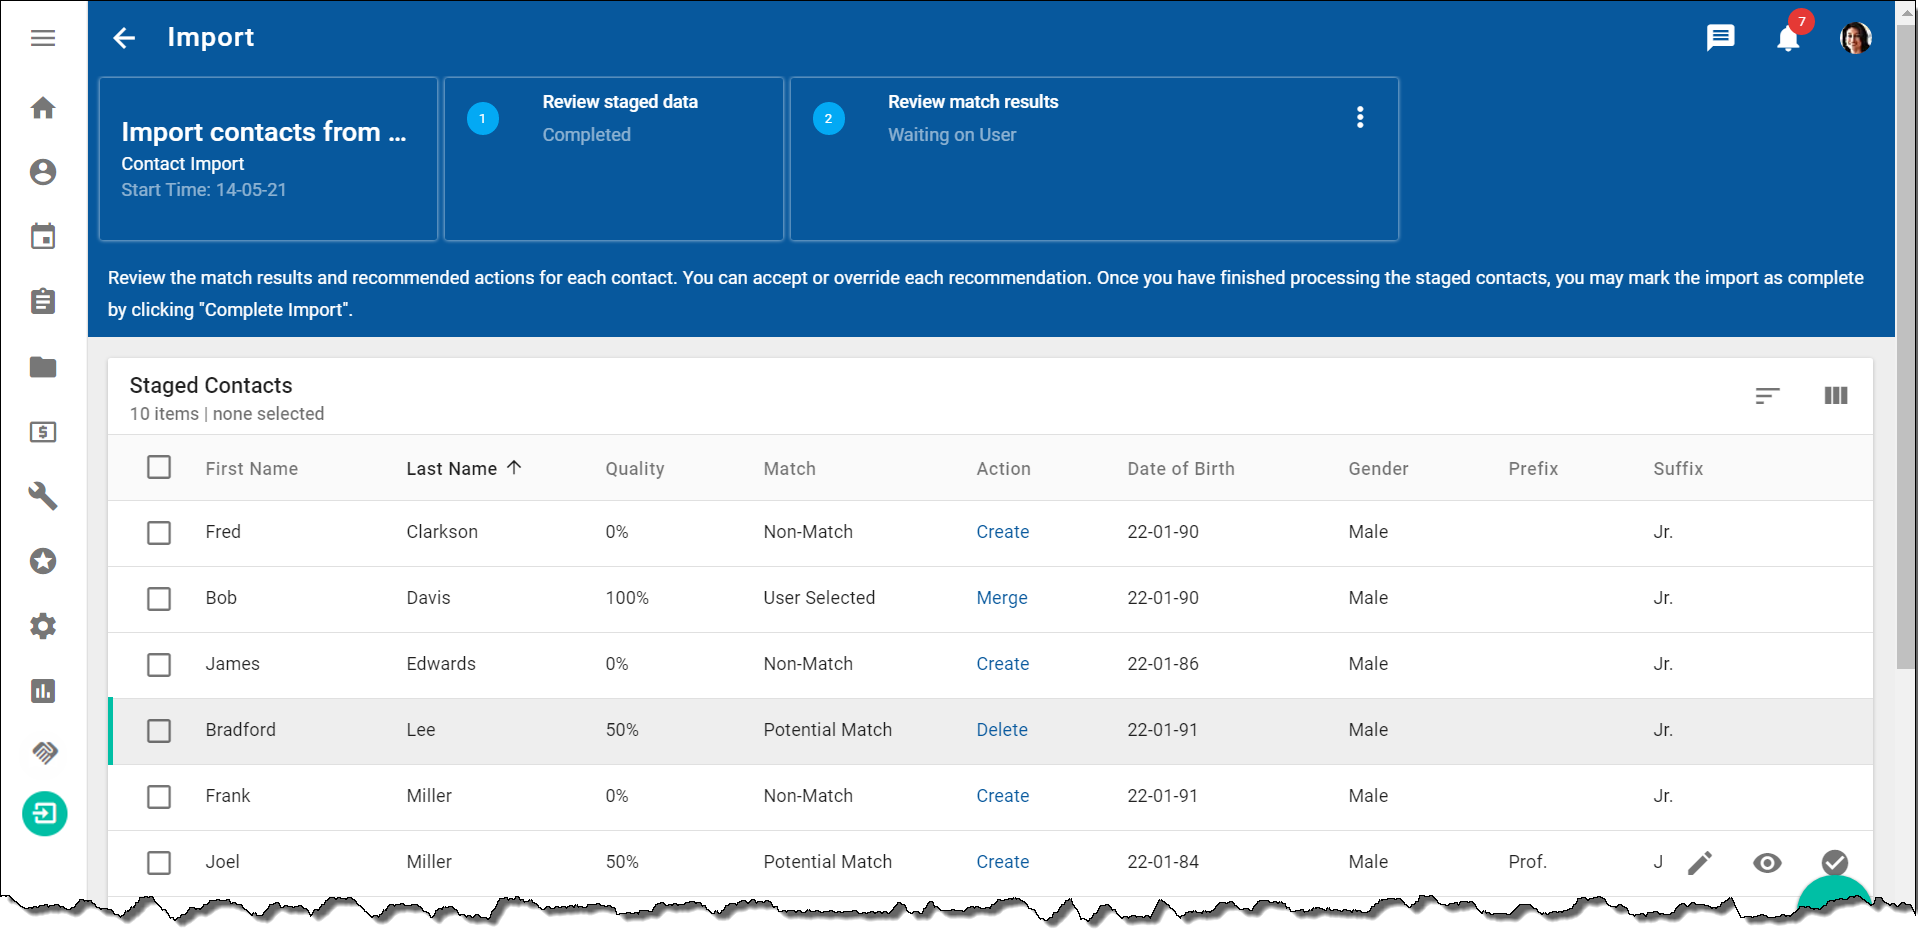
Wait while the matching process runs in the background. When the process completes, the banner displays that the Review staged data stage is "Completed" and the Review match results stage is "Waiting on User."
You may need to refresh your browser to see the changes in the banner.
You can now review the ranked contact matches on screen.
Contact matching logic
When you submit contact data for matching, NexJ CRM uses algorithms to determine which contact data is new and which data is duplicated in NexJ CRM and should be consolidated with an existing contact record.
The following table lists the data fields that are used by NexJ CRM to match imported contact records and shows percentages for the quality of the match.
Contact matching data fields and match quality values
Data field
Match quality value
First Name
20%
Last Name
30%
Birth Date
30%
Gender
5%
Zip field of the primary address
15%
Lead matching logic
The following table lists the data fields that are used by NexJ CRM to match imported lead records and shows percentages for the quality of the match.
Lead matching data fields and match quality values
Data field
Match quality value
First Name
15%
Last Name
15%
Work Phone
40%
Email
30%
If only the gender matches, the match quality is 5%. This is considered a low quality match, so you may choose to create a new contact.
If the last name, birth date, and Zip field match, the match quality is 75%. This is considered a high quality match, so you may choose to associate the imported contact record with the existing NexJ CRM record.
For example, for lead records:
If only the work phone number matches, the match quality is 40%. This is considered a low quality match, so you may choose to create a new lead.
If an email address, work phone number, and at least one first name or last name match, the match quality is 85%. This is considered a high quality match, so you may choose to associate the imported data with the existing NexJ CRM lead.
Reviewing match results
Before you review match results, your import job's Stage column in the Import data table on the Import workspace should display "Review Match Results", and the Status column should display "Waiting on User."
After the matching process has completed, you can review the match results, recommend actions for each record, and process the data.Import detail page
Match column
Action column
Description
Non-Match
Create
No match has been found for the record so the system proposes you create the record as a new record.
Match
Merge
The system has found a record that matches the staged record and proposes that you merge the duplicate data.
Potential Match
Create
The system has found a record that potentially matches the staged record and proposes that you create a new record.
Review Match Results button , and review the Matches section in the Review Match Results page.
Specifying import actions
After you have reviewed the match results, select import actions for selected records to indicate how they should be moved into the existing database. You can select one of the following actions for a selected contact record by clicking on a proposed action in the Action column in the Stage Contacts data table:
Import action
Select when...
Create as a new contact
The staged contact record does not match with any of the contacts in the Review Match Results page and you want to load it into the database.
Delete staged contact
You no longer want to add the staged contact record to your database, or if a better contact record already exists within the database and merging would degrade the matched contact's quality.
Merge with selected match
The staged contact record matches with any of the contacts listed in the Matches section on the Review Match Results page.
Info
You must select an existing contact record with which to merge the imported data.
For lead records, choose from the following import actions:
Import action
Select when...
Create new lead
The staged lead record does not match with any of the leads in the Review Match Results page and you want to load it into the database.
Discard lead
You no longer want to add the staged lead record to your database, or if a better lead record already exists within the database and merging would degrade the matched lead's quality.
Associate lead
The staged lead record matches with any of the leads listed in the Matches section on the Review Match Results page.
Info
You must select an existing contact record with which to merge the imported data.
Next, proceed to processing the reviewed data.
Processing reviewed data
To execute a create, merge, or delete import action, you must process a staged contact or lead.Before you process a record or all records in the Staged Contacts or Staged Leads data table, confirm that the correct actions are selected for each record in the Action column. When you are ready, select the record and click the Process Selected button or select all records in the data table and click theProcess List button in the data table toolbar.Next, proceed to completing the import.
Completing the import
Complete the import to indicate that you have finished all work on the import package by navigating to the banner in the Import detail page, and clicking Complete Import.
Note
Completing an import ends the import process. Any unprocessed records in the import are discarded. This action cannot be undone.
Do not continue until you receive a message in the banner stating that the import has been marked as complete.
After the import completes, the Status column for the import job on the Import workspace displays "Completed," the contact or lead records become available in the system, and can be accessed like any other contact or lead records.
JavaScript errors detected
Please note, these errors can depend on your browser setup.
If this problem persists, please contact our support.